Introduction
Any machinist will tell you that one of the hardest parts of producing a CNC part is the fixturing. Often, machine parts require multiple setups in order to produce the necessary geometry. Fixturing oddly shaped parts is difficult and requires machining custom fixtures to hold parts accurately and securely. I wanted to see if 3D printing could make the fixturing process cheaper, quicker, and easier, so I designed a test to compare a 3D printed fixture to a machined aluminum fixture. I'll compare these two methods in three different areas: time, cost, and performance.
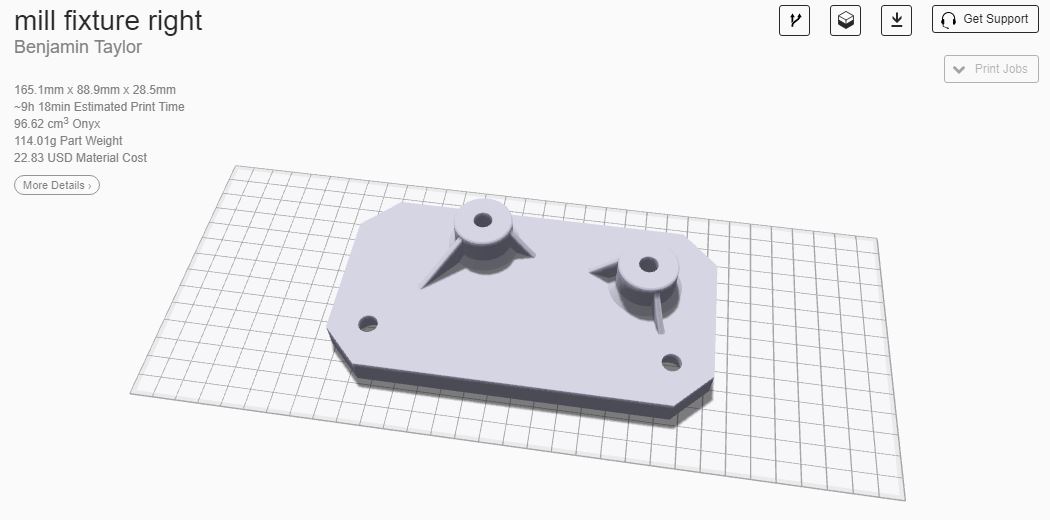
The Part
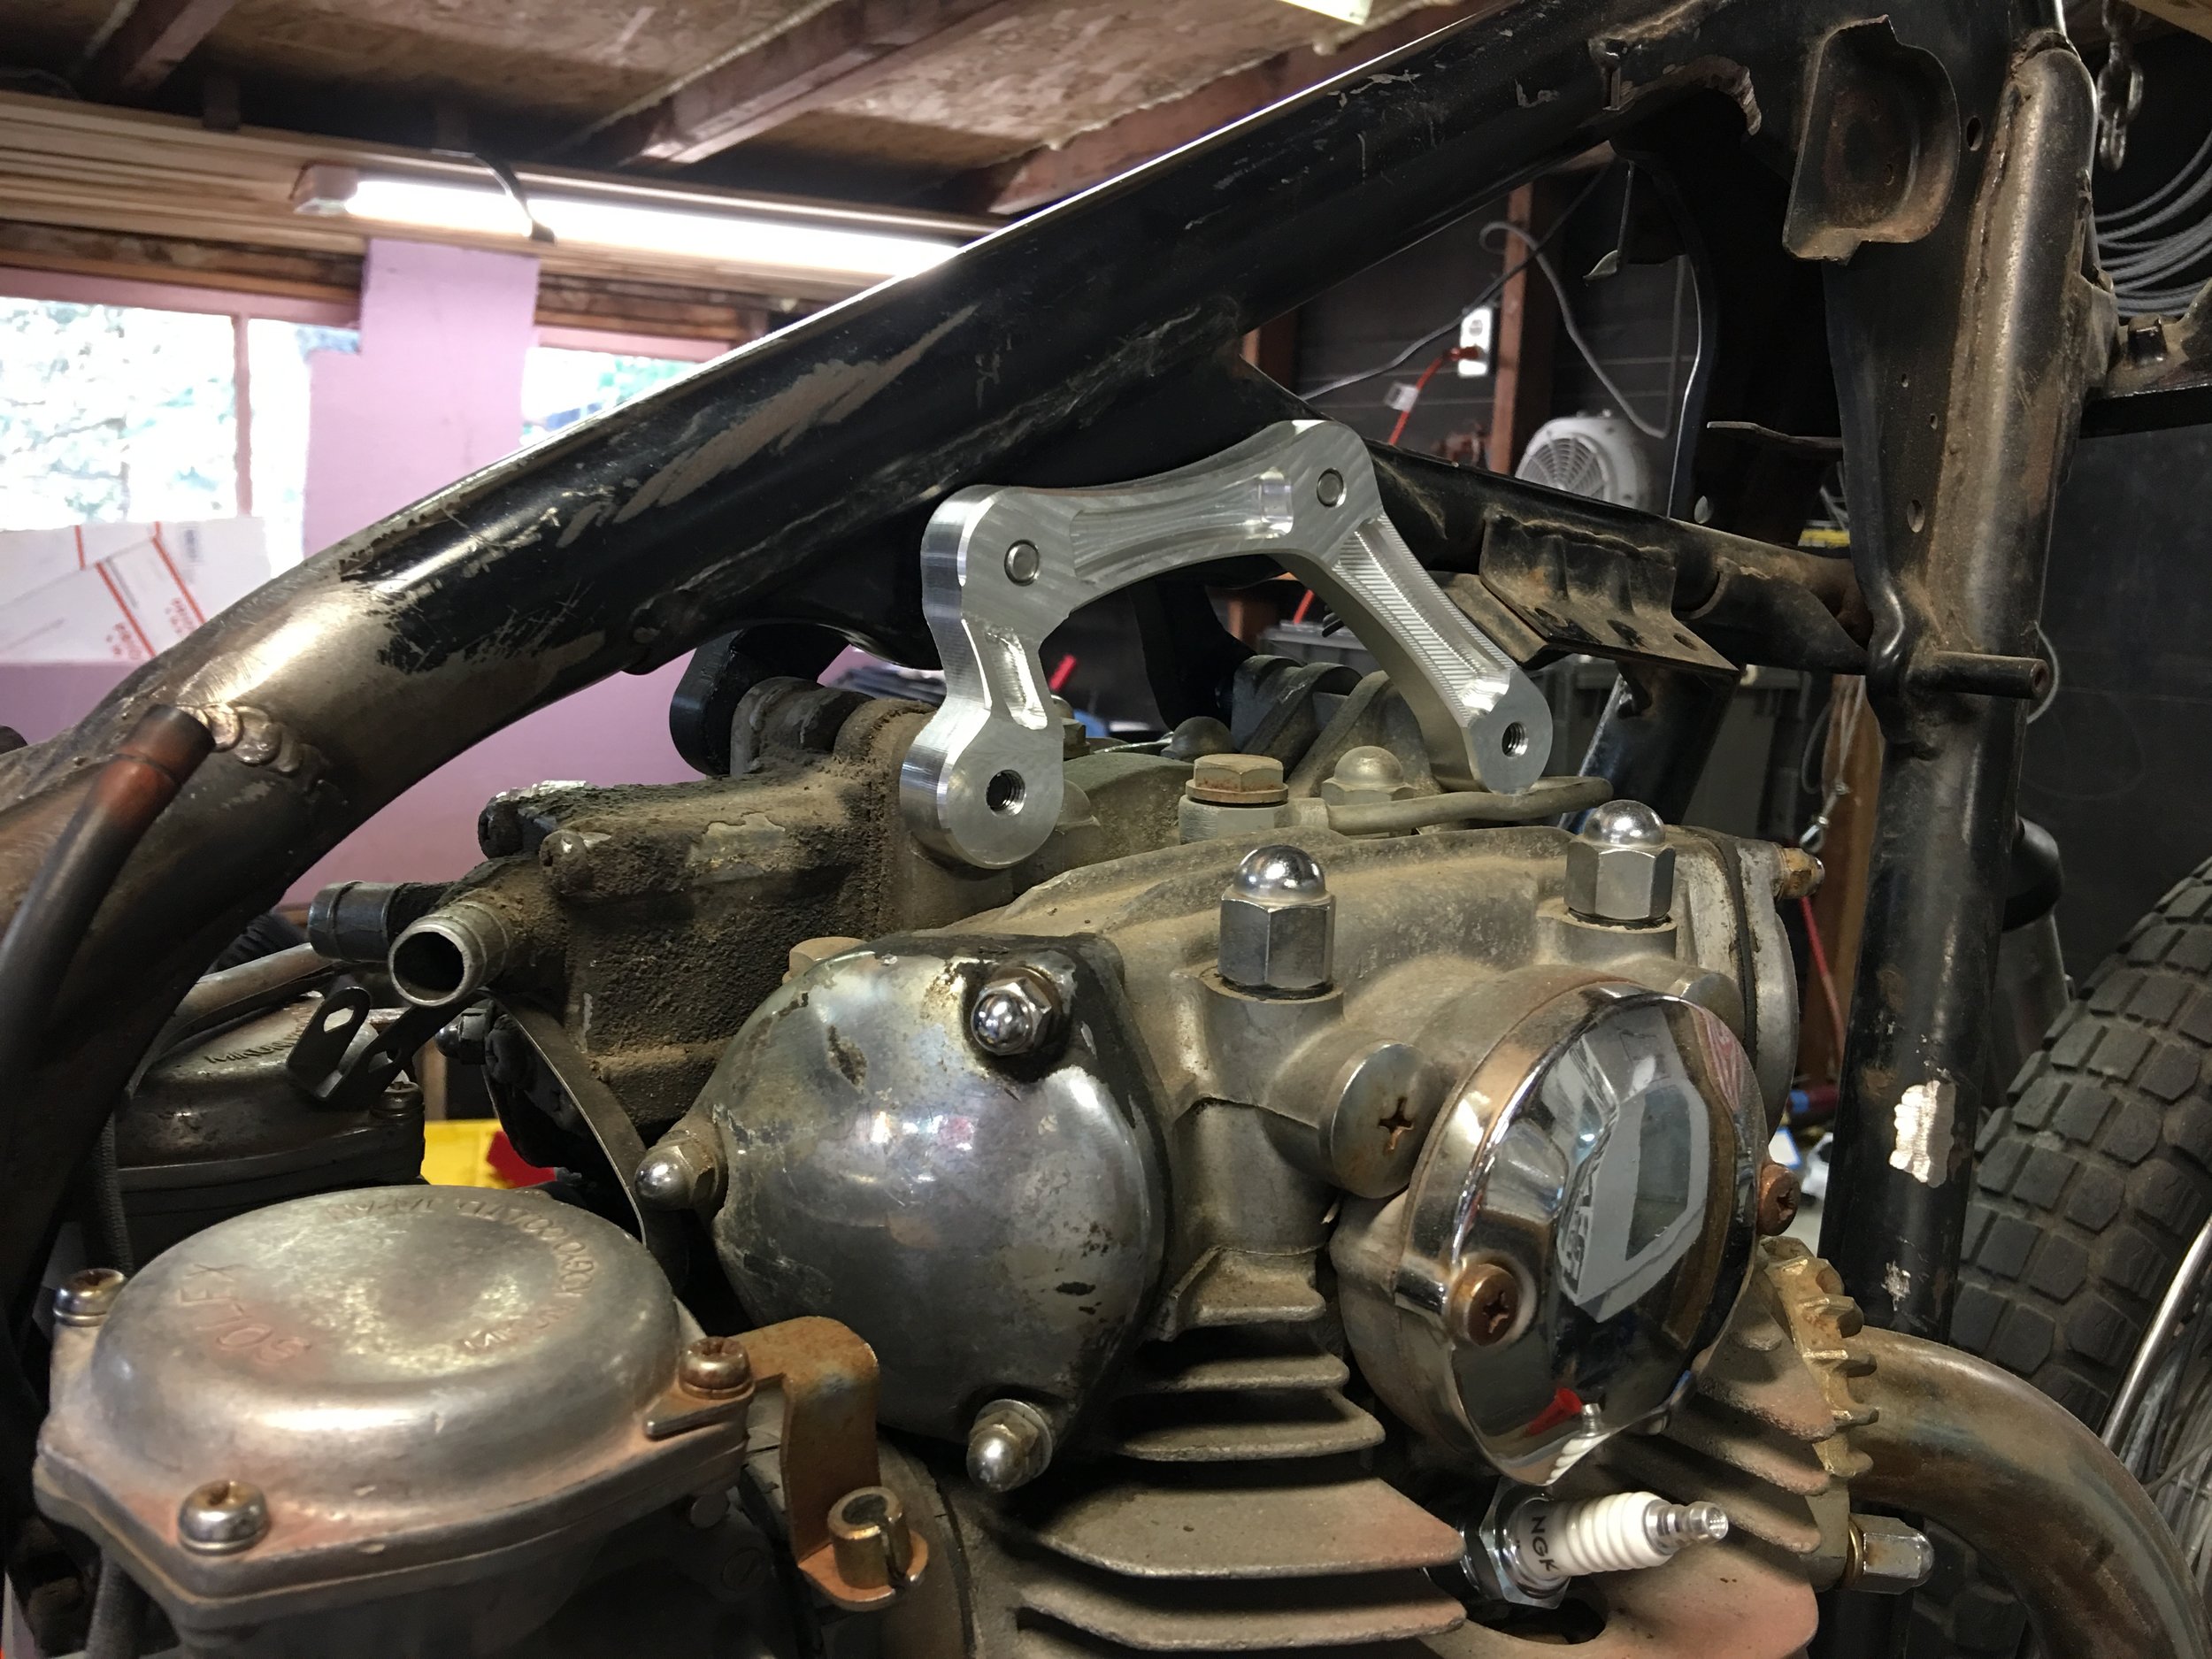
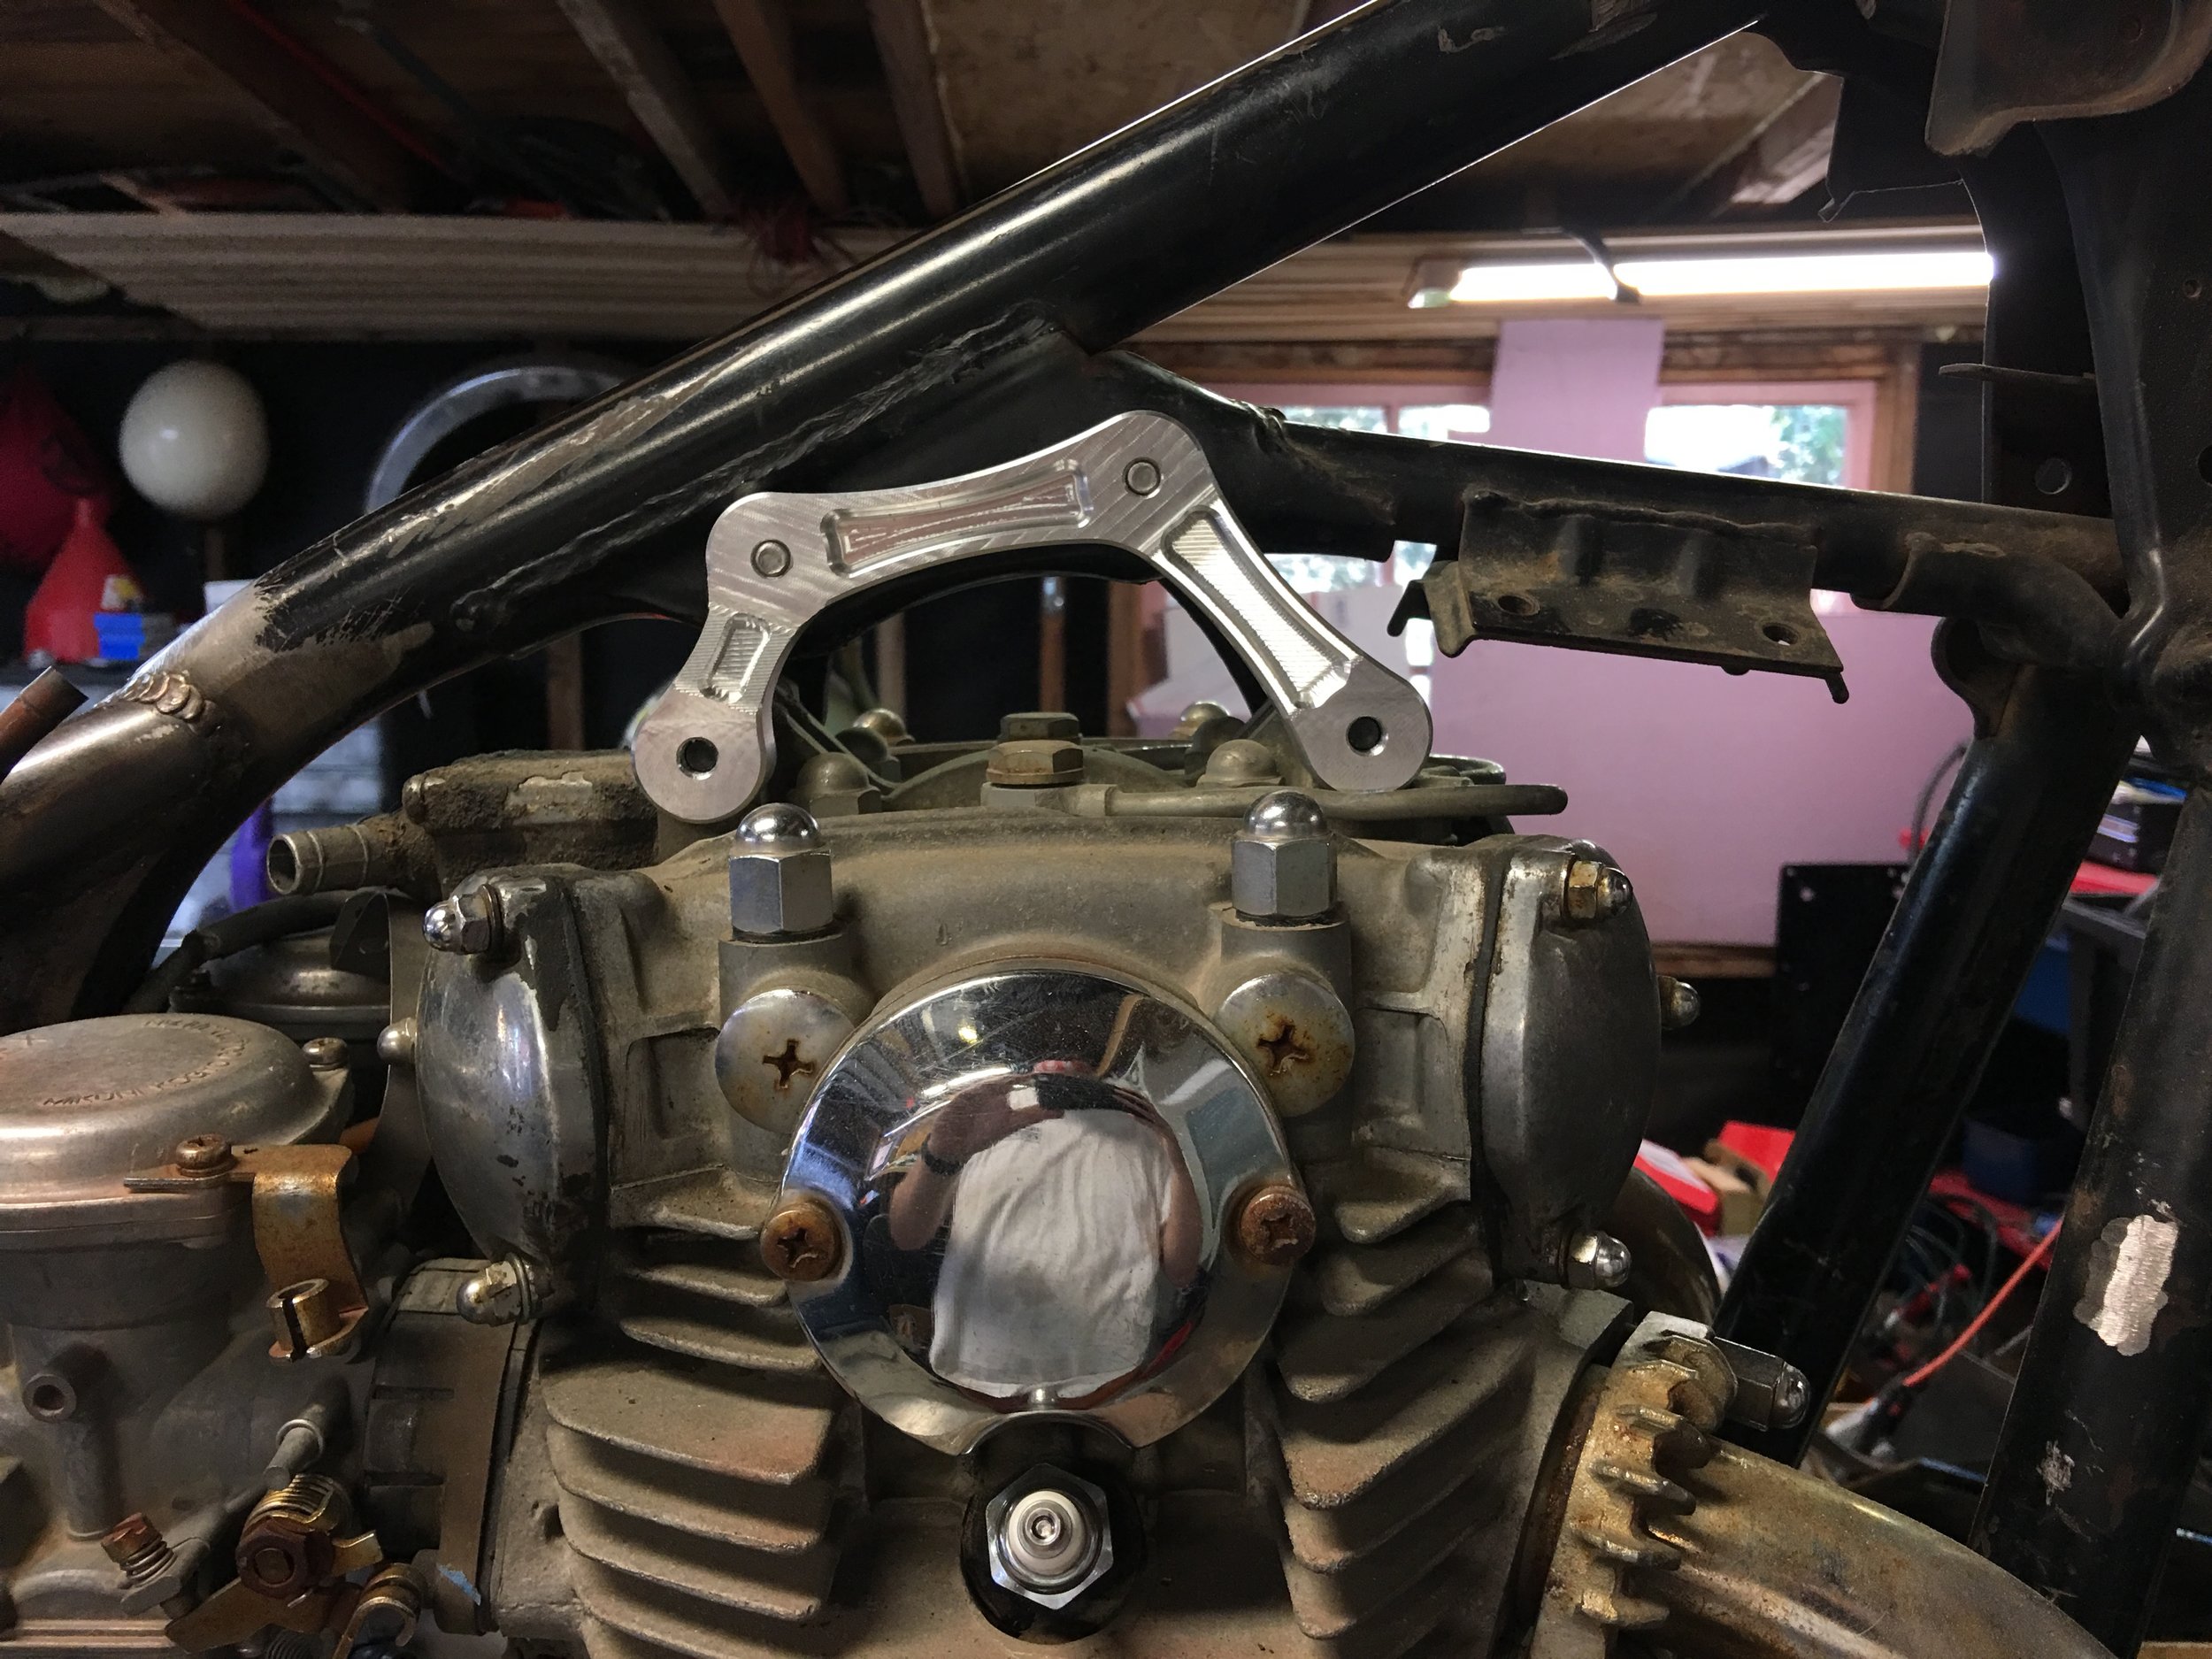
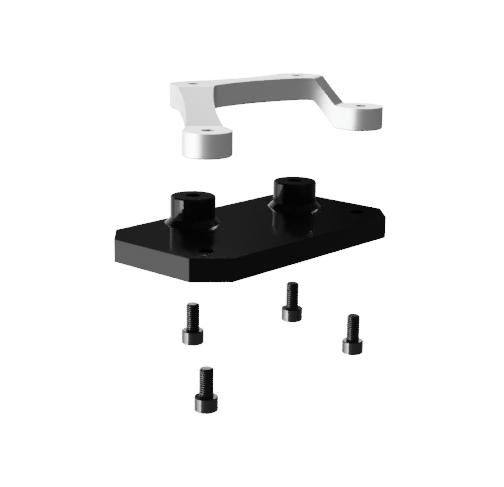
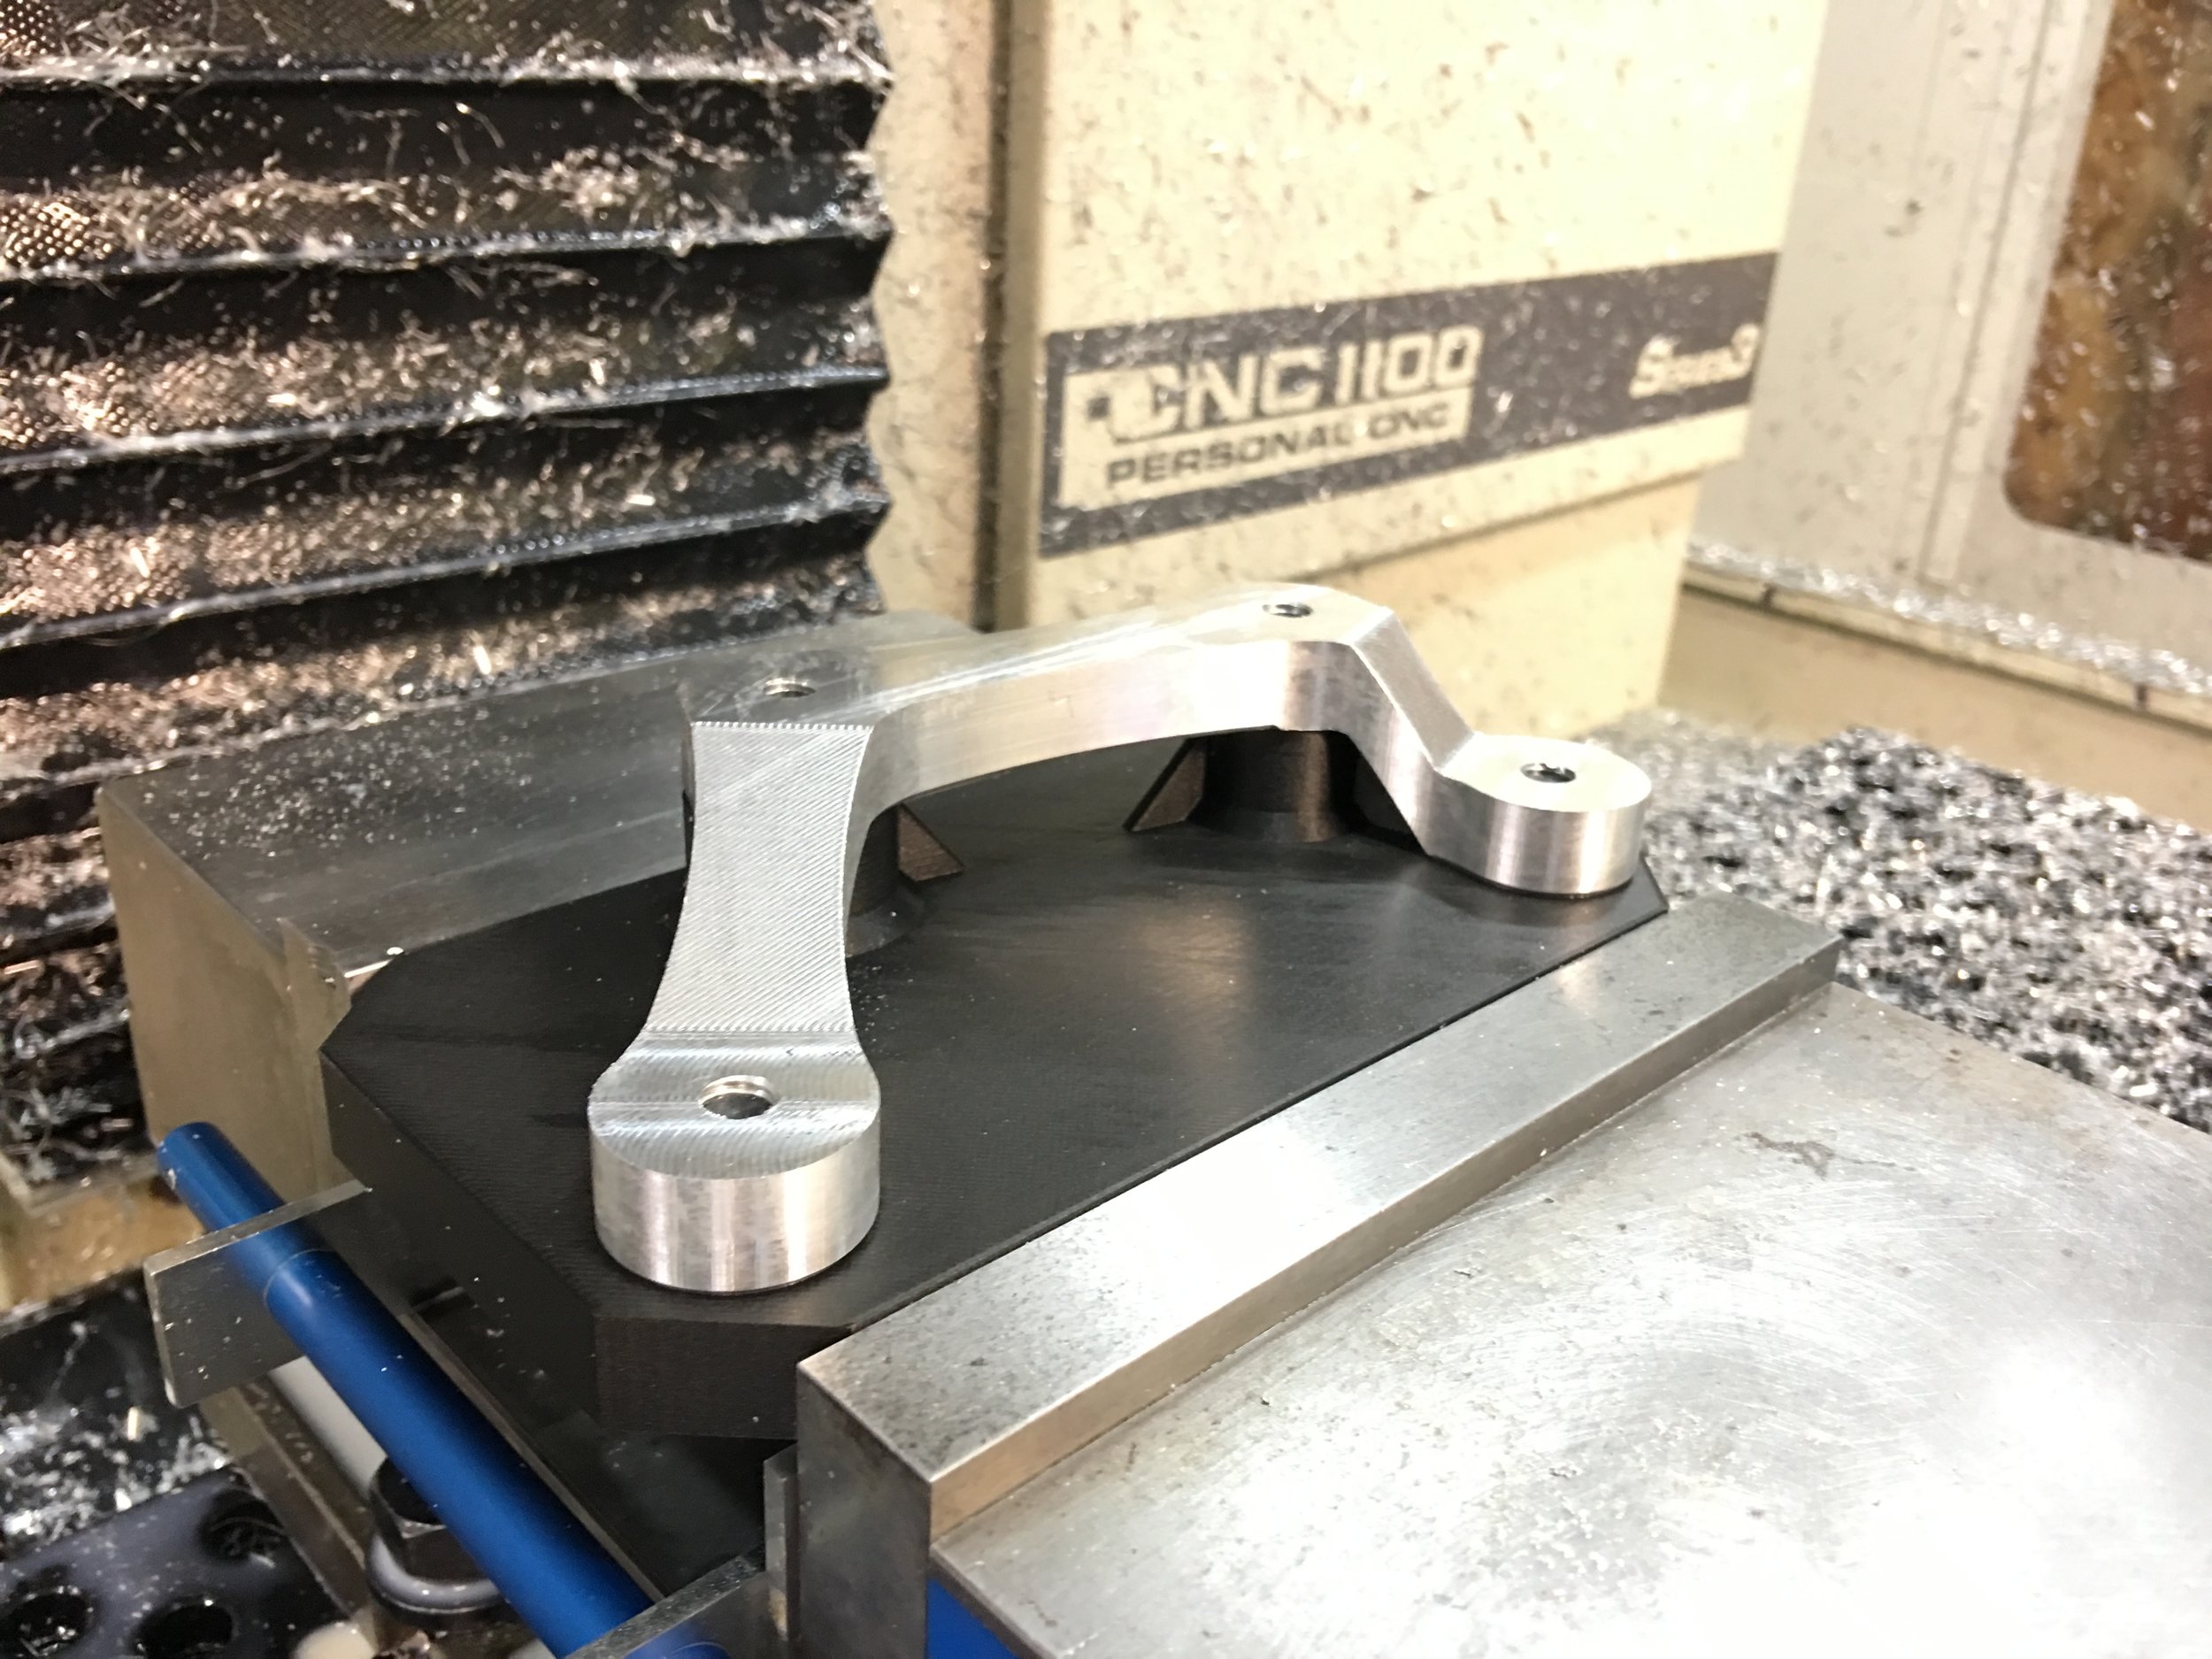
For this test I chose to make a motor mount for a motorcycle project that I'm currently working on. This is the upper motor mount and it is made from 6061 aluminum.

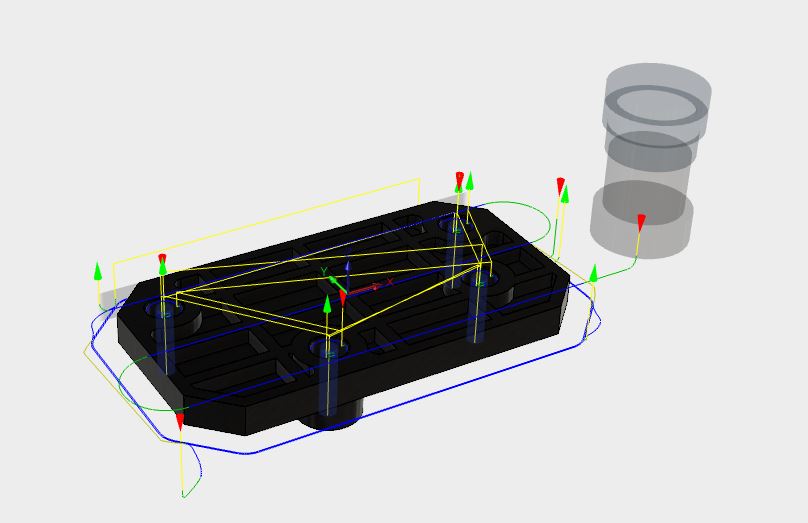
CAD render of the part to be made
I chose this part for two reasons: first, it requires a large amount of material removal, and second, it had an irregular shape. Because such a large amount of material needed to be removed, the fixture had to be rigid to hold up to heavy machining. The part's irregular shape means that simply clamping the part in a vice isn't practical, so I needed a fixture to hold the part in the required positions in order to machine all sides of the part.
Procedure
The machining process consisted of two setups. The first was simply a piece of rectangular aluminum bar stock clamped in a 6" machine vice, allowing me to machine the more complex side of the part.
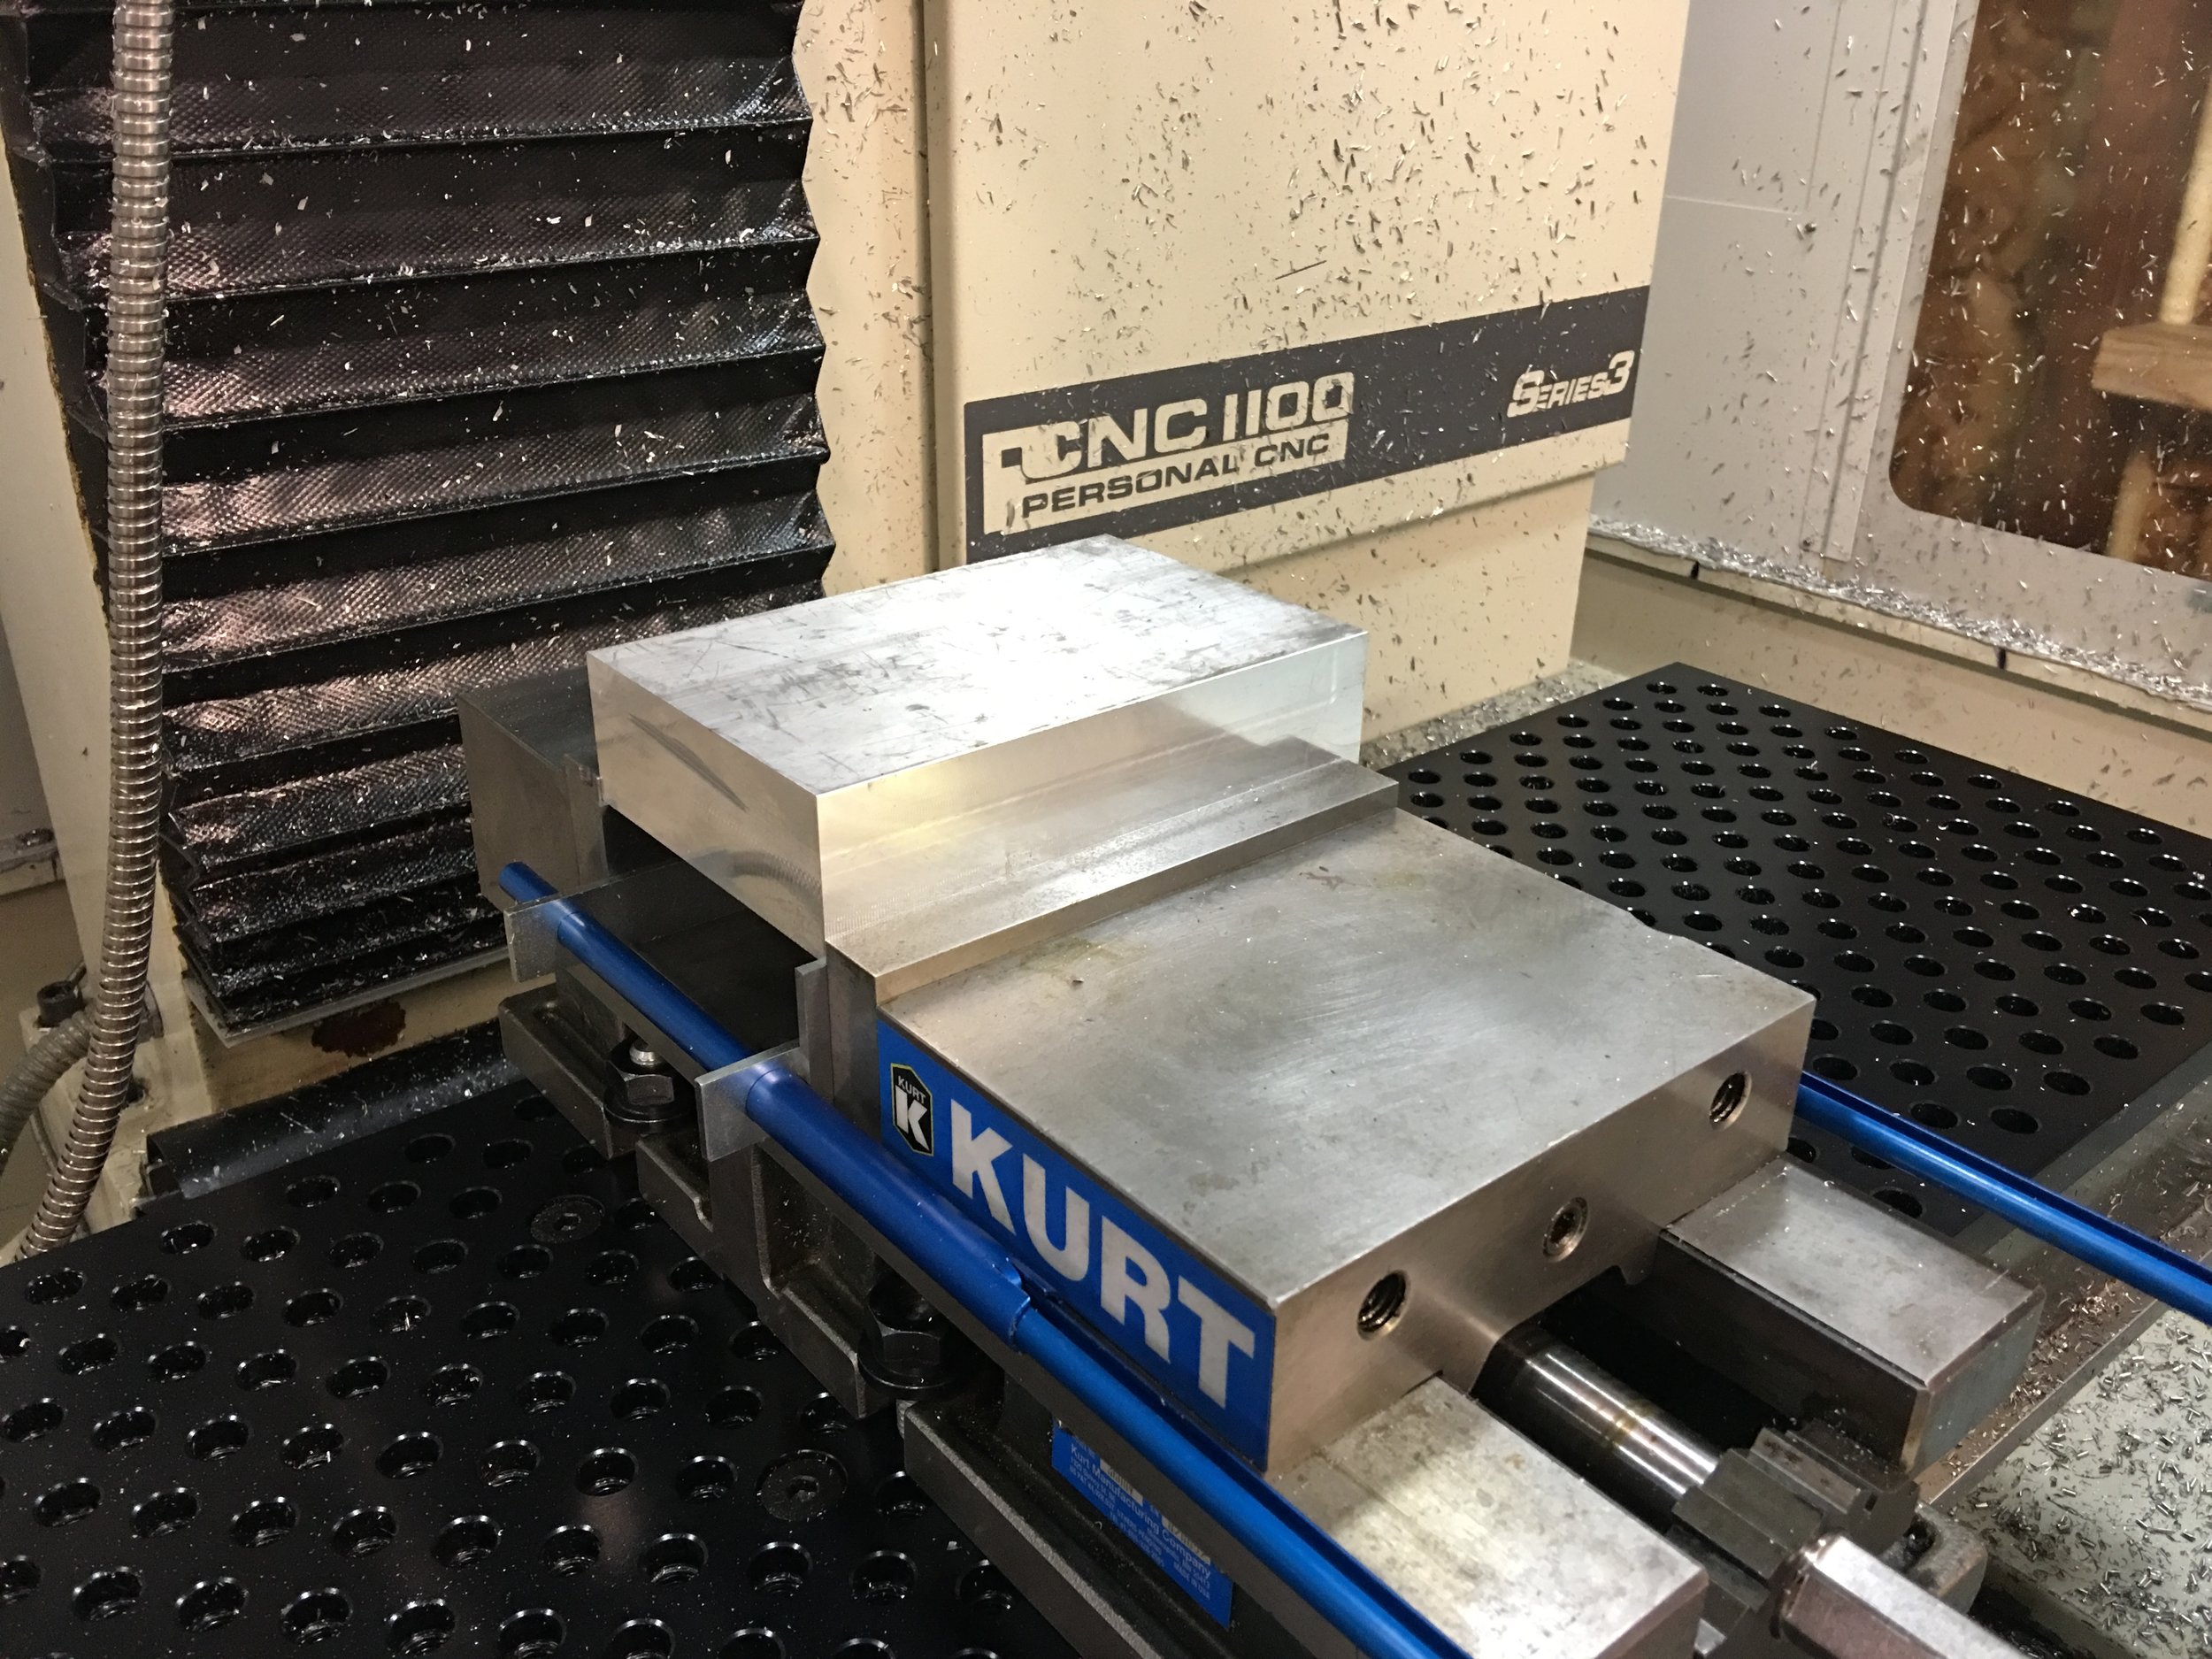
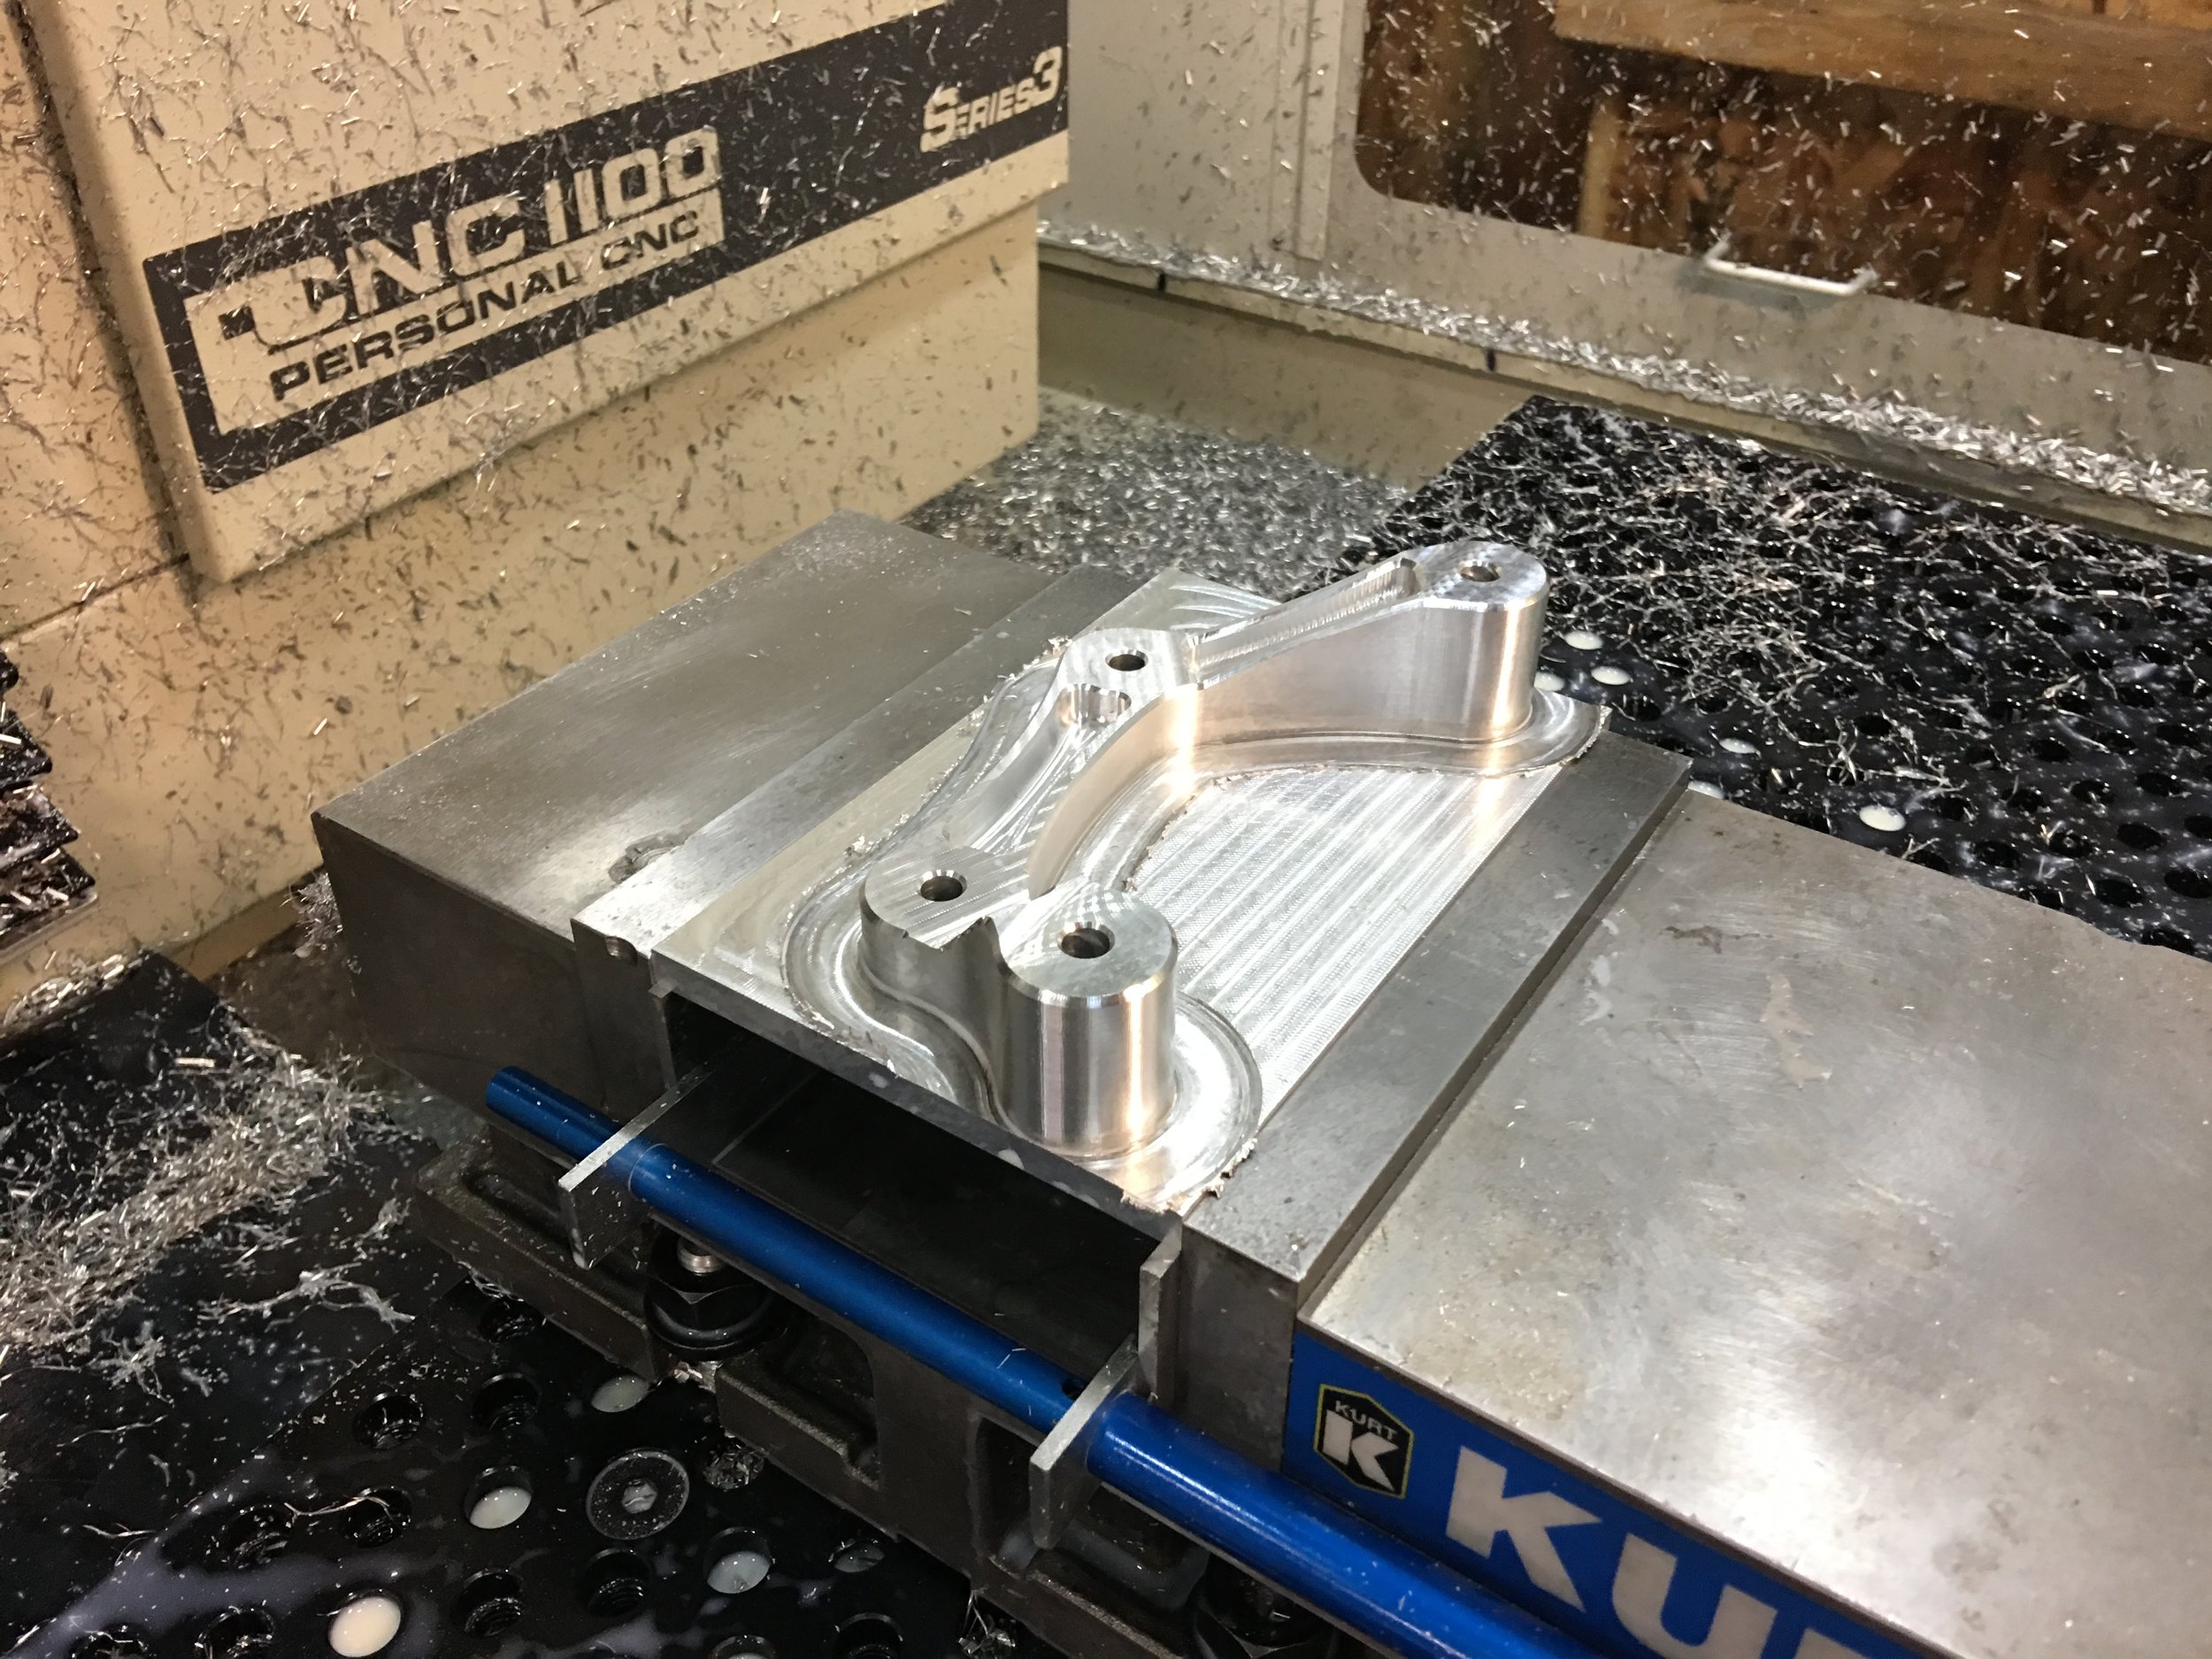
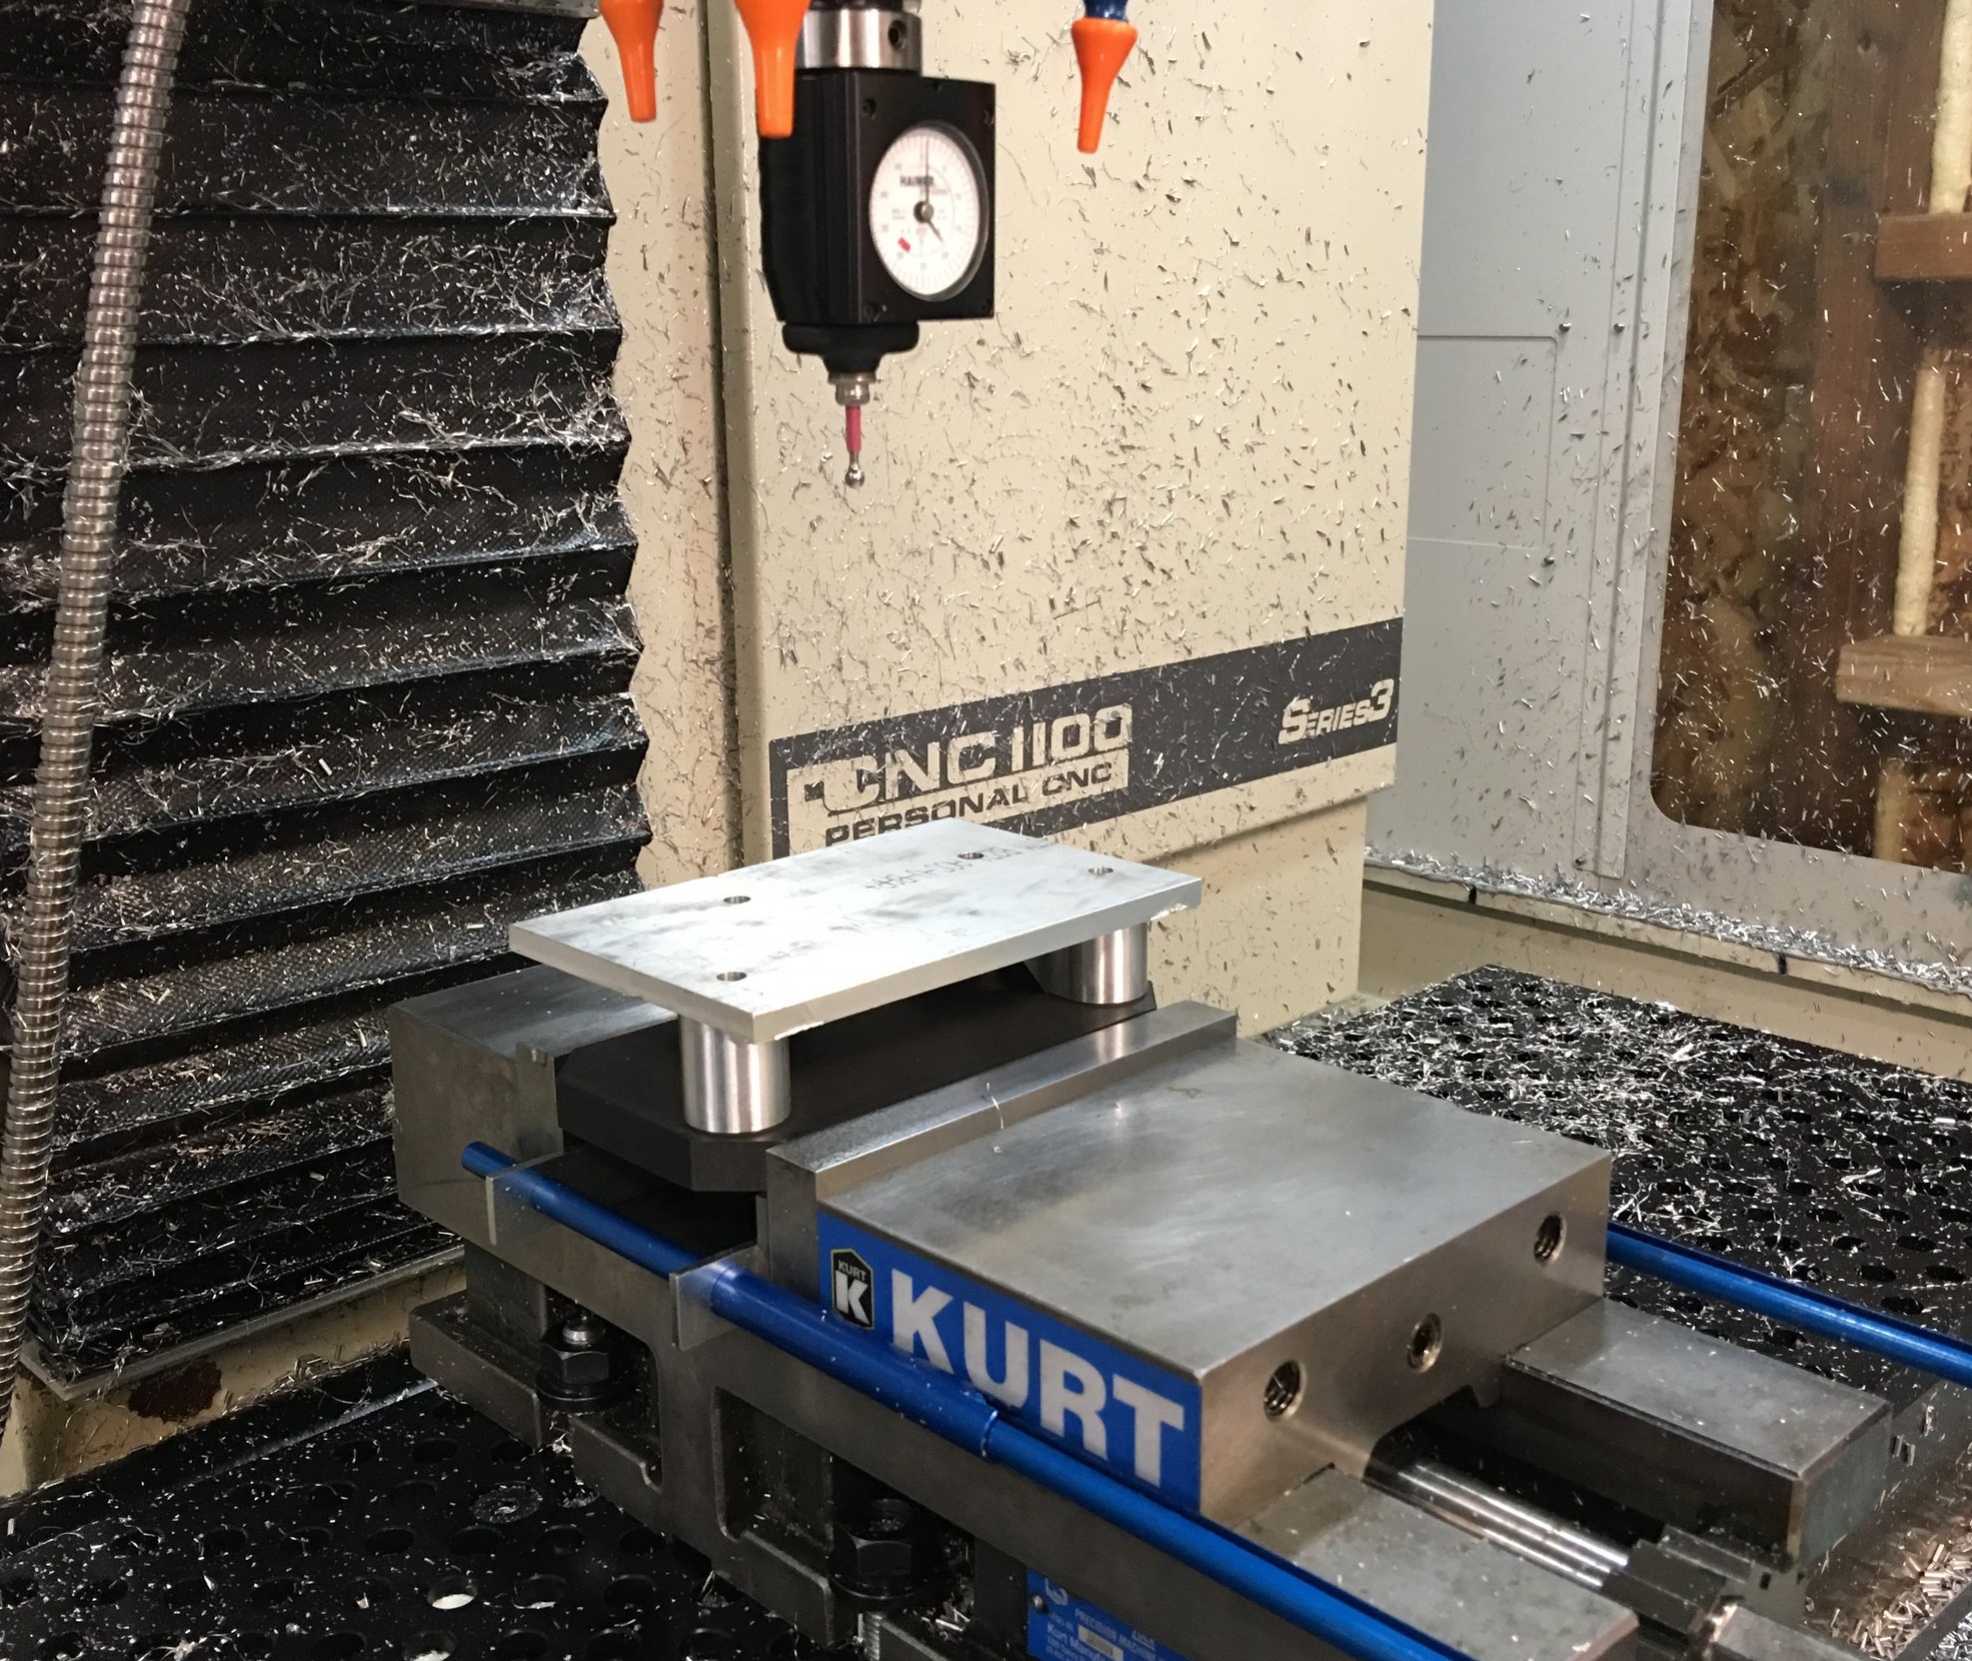
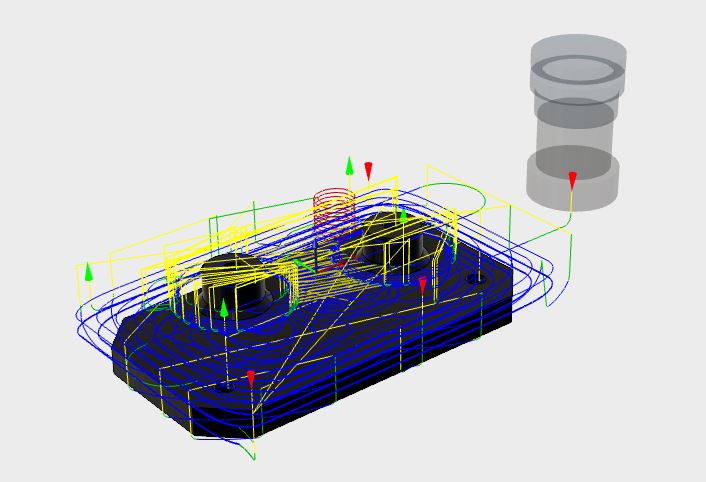
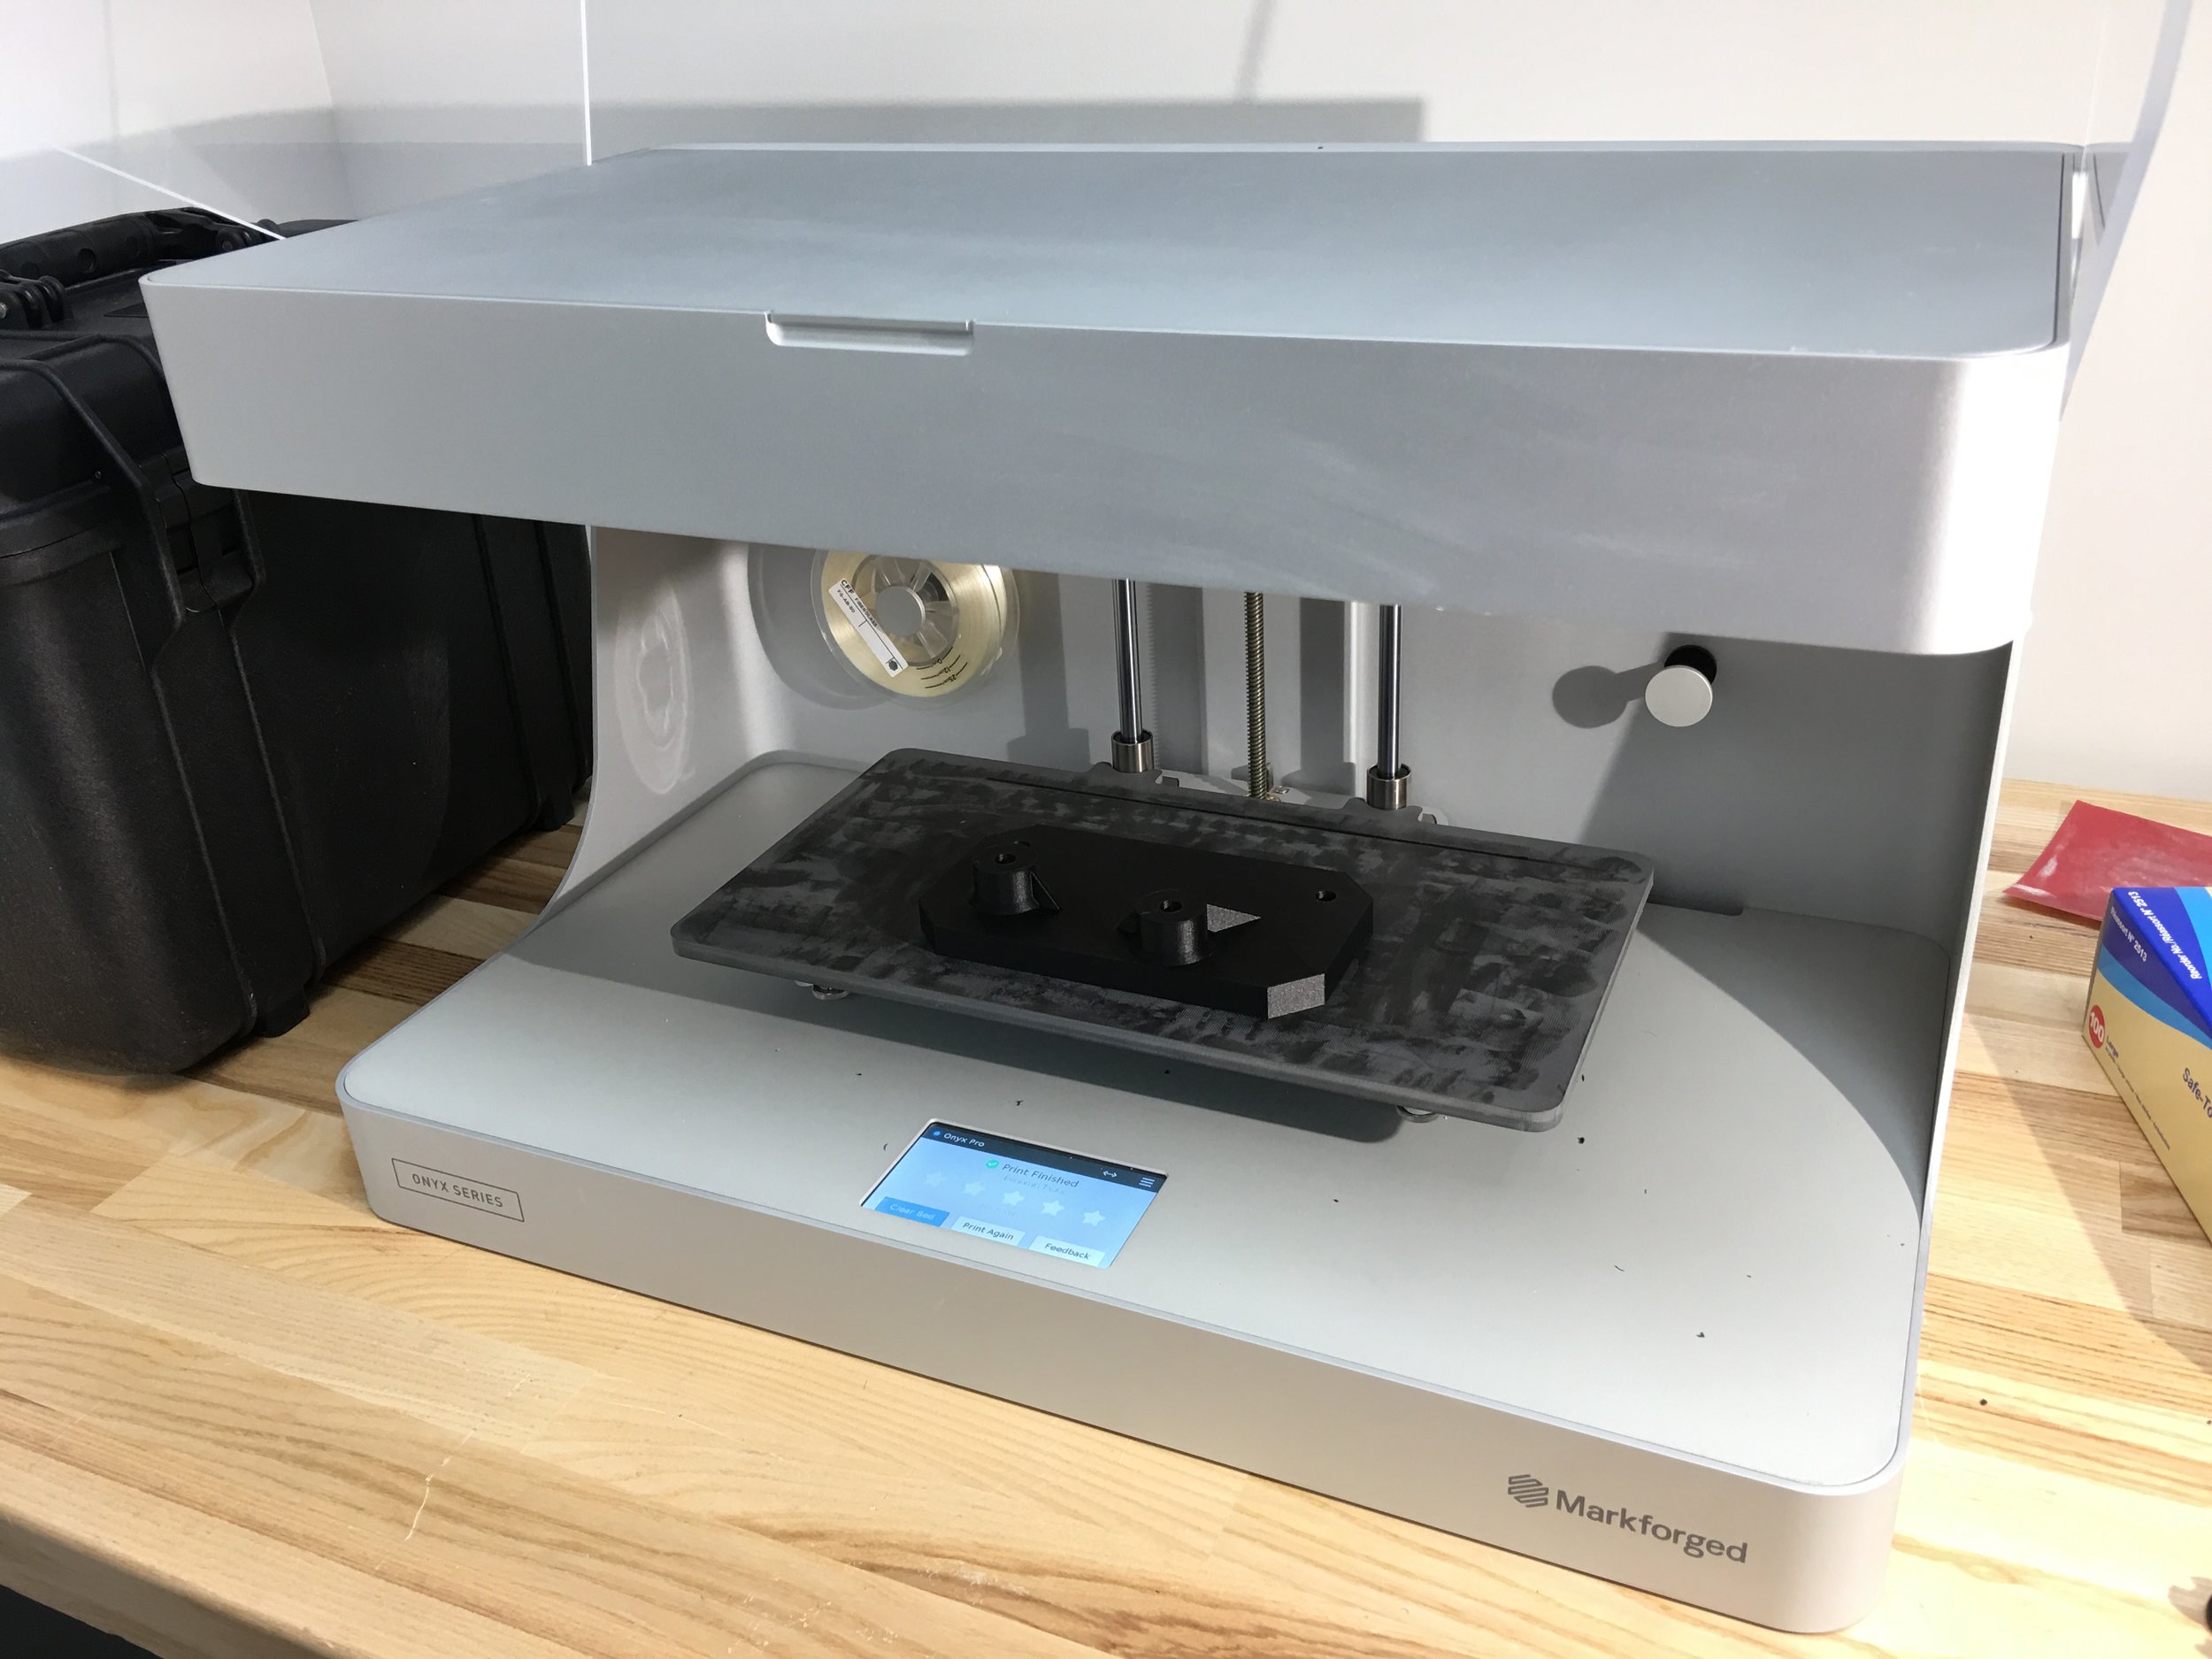
The second setup was to machine the back side of the part and required the machine fixture to hold the previously machined surfaces in a known position. I could then reference this position to produce toolpaths that matched those from the previous setup. Luckily, the motor mount has four M8 threaded holes that were drilled and tapped in the first setup; the fixture bolts to the motor mount using these holes and the whole assembly was clamped in the vice.
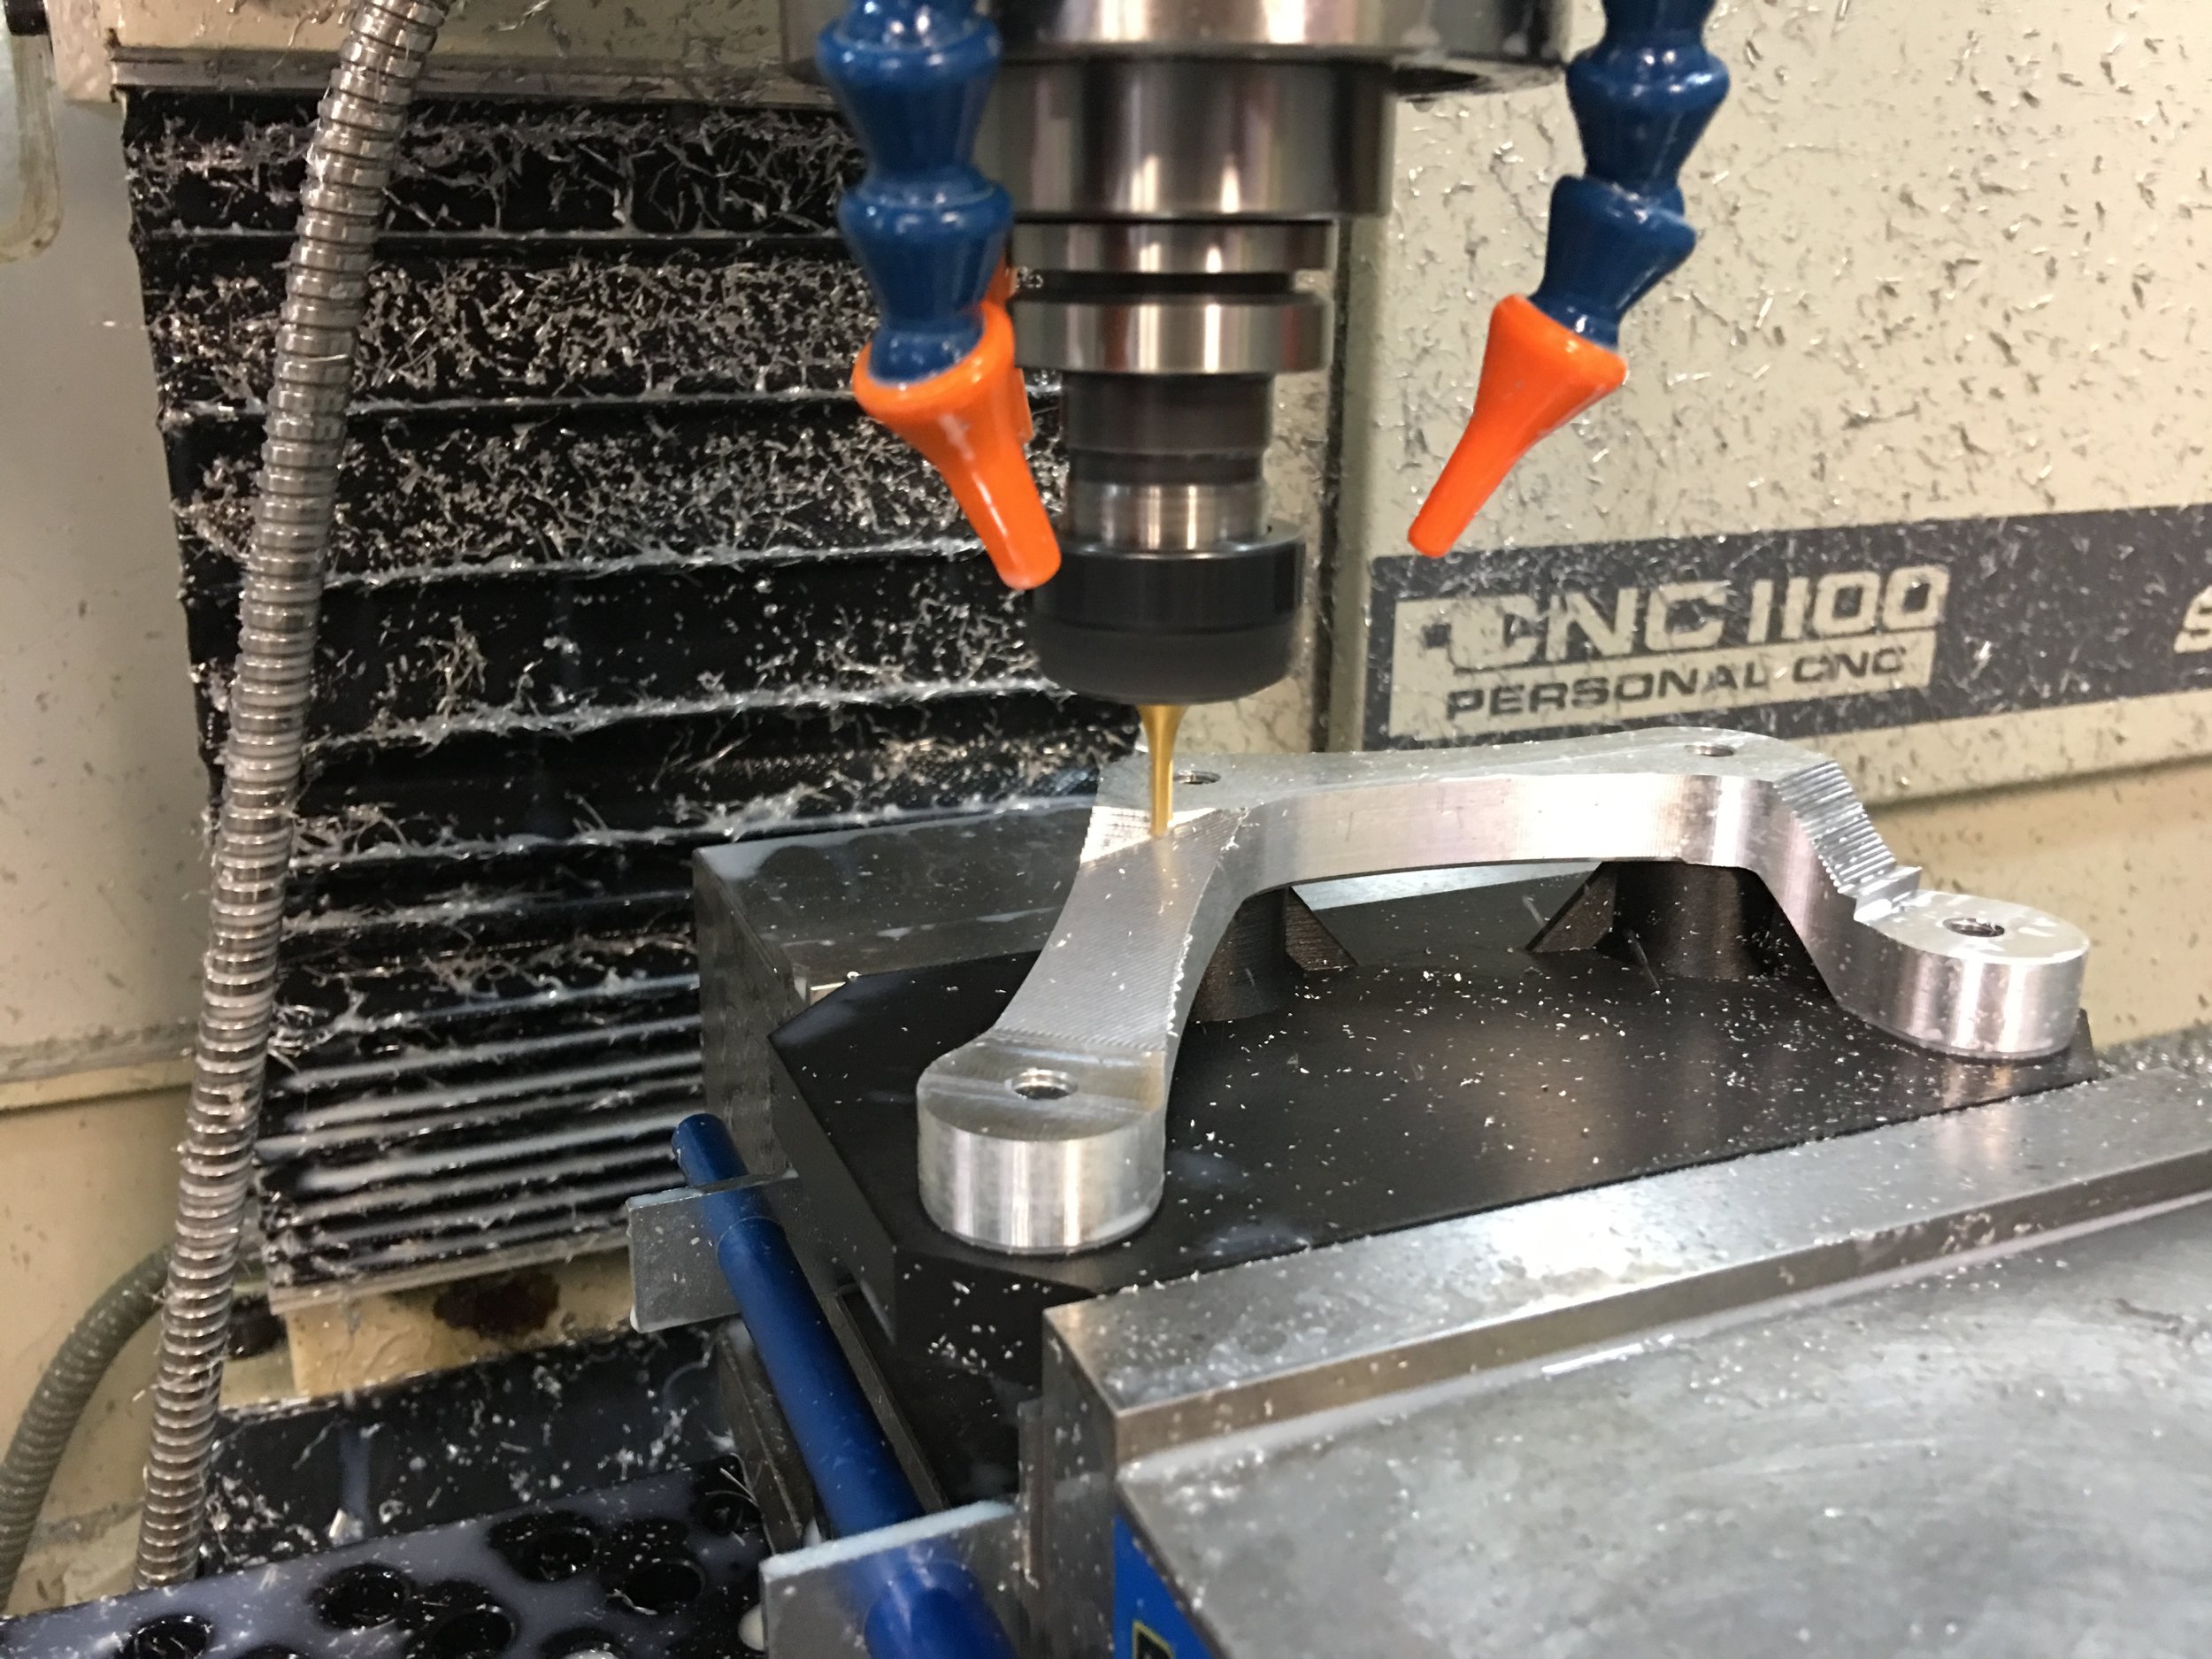
The second setup had two main toolpaths: first, an adaptive clearing to remove large amounts of material quickly, and second, a 3D surfacing operation to finish off the part. The fixture was both rigid enough to hold up to the adaptive clearing and accurate enough that both setups matched perfectly.
Time
It would take about 1.85 hours to machine this fixture from aluminum and it took 9.3 hours to 3D print the fixture. Design time for the fixture had to be done for either 3D printing or milling, so I neglected design time for these numbers. The time to mill a fixture includes 0.5 hours for CAM programming, 0.25 hours for cutting stock, 0.5 hours for setup, and 0.6 hours for the actual machine time. The 3D printing time is simply the time it took for the part to print on the Onyx Pro printer from Markforged.
When simply looking at the numbers for time, machining a fixture seems like a favorable option, but when considering the overall process of producing the part, I think 3D printing the fixture was faster. The first thing I did when starting this project was to design the fixture and send it to the printer to get started. While the printer was running I was able to write the toolpaths for the two setups, cut the stock material to size, and run the first setup. By the next morning, the fixture was done printing and I could run the second setup.
Since the 3D printer could run alone, I was able to work on other aspects of the part production instead of spending my time machining the fixture. For this particular part, I saved time by letting the 3D printer produce a fixture for me.
Cost
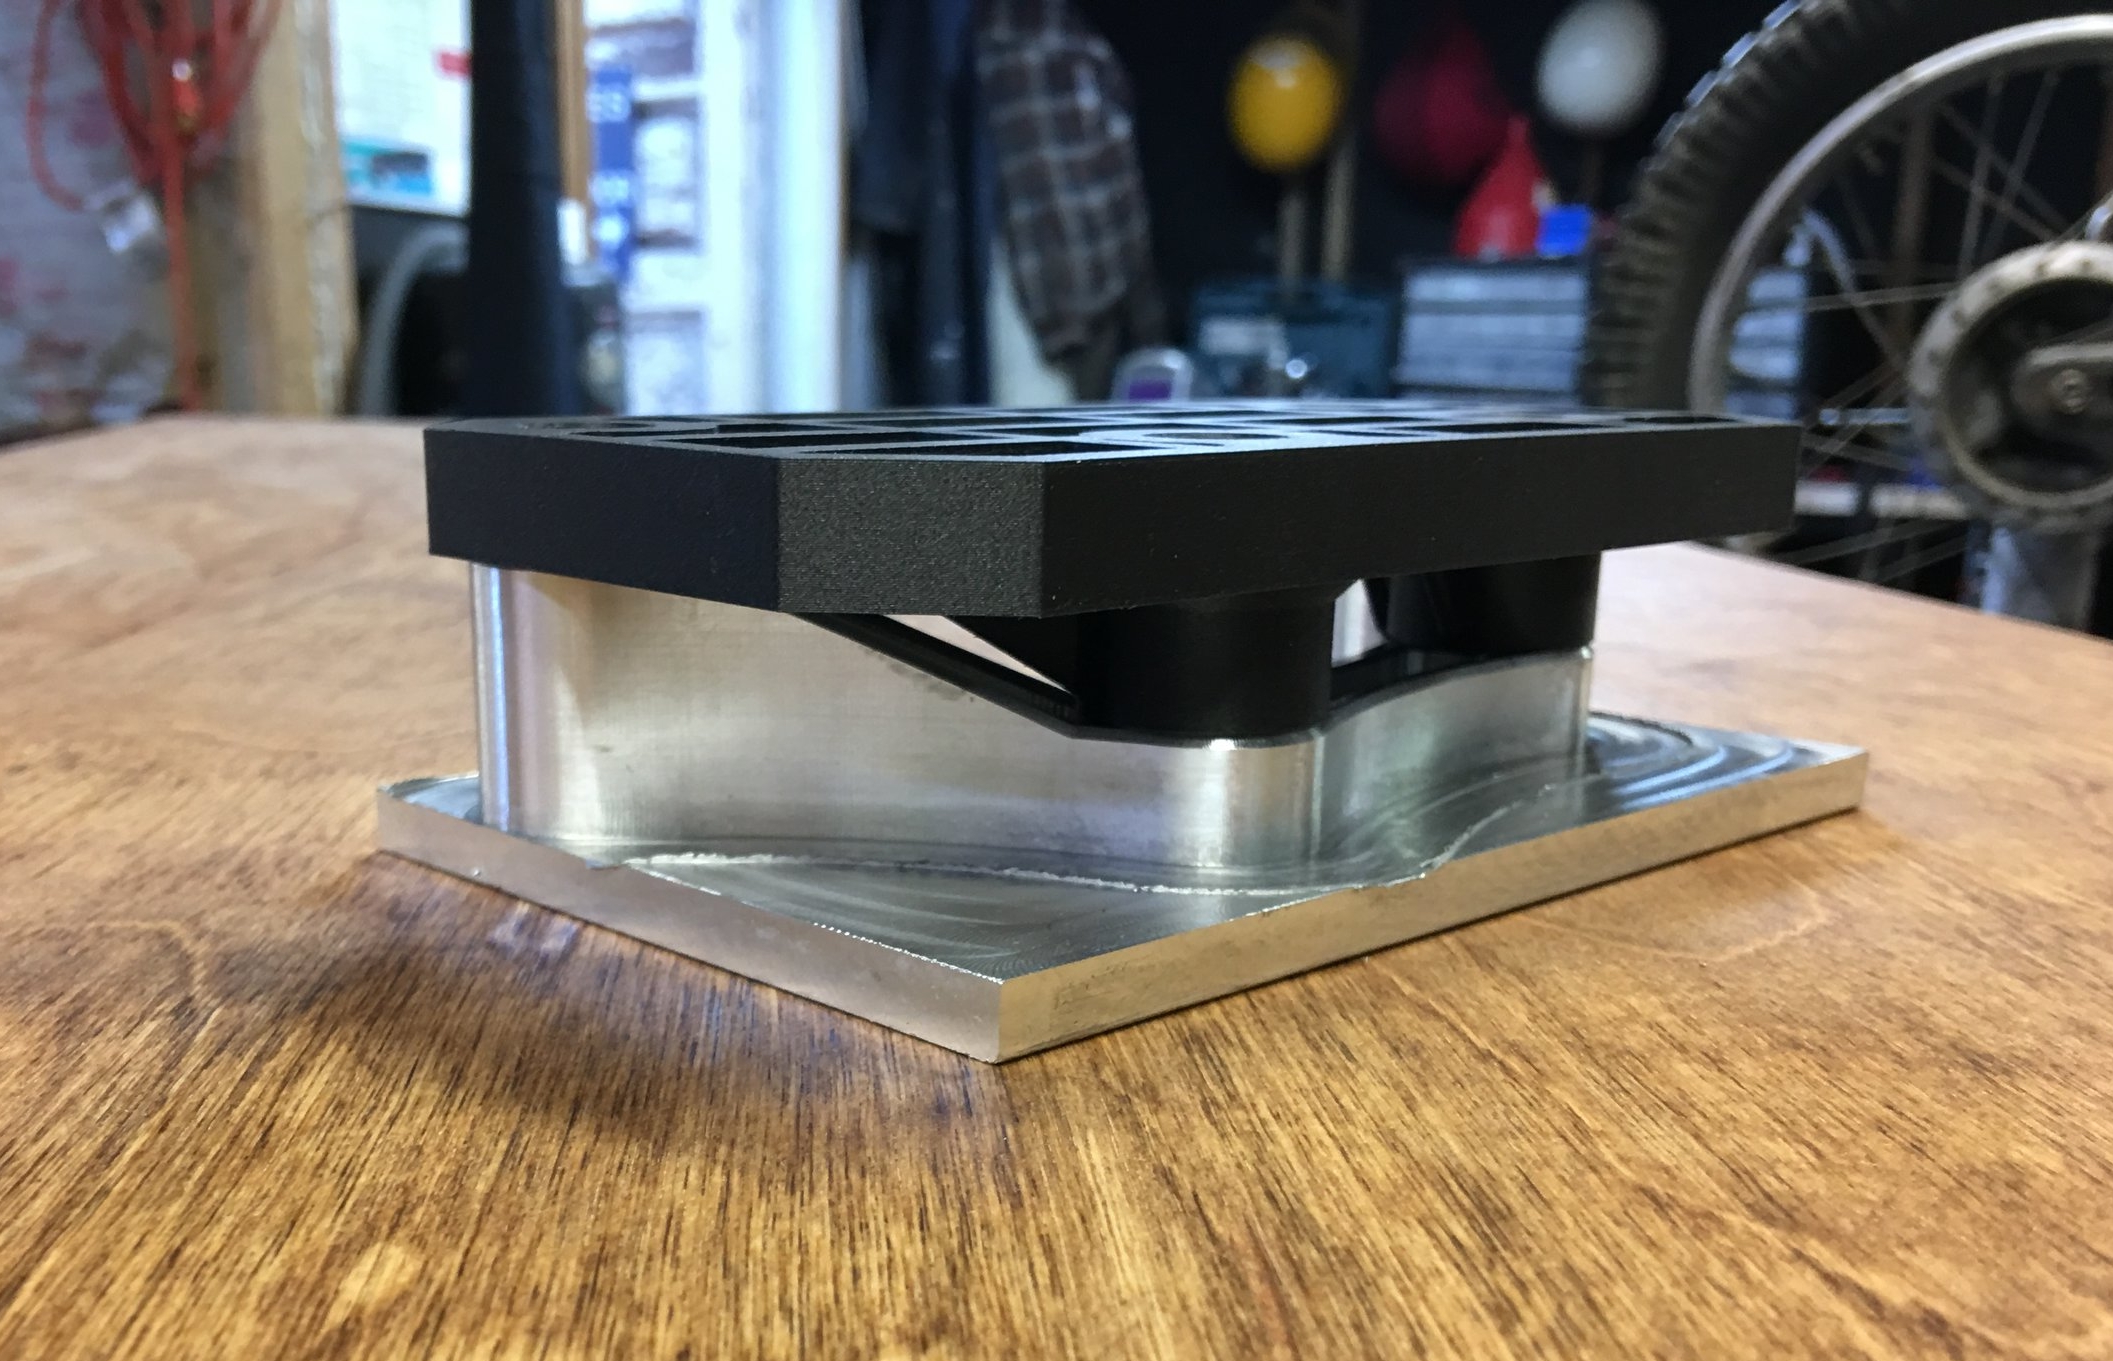
The estimated cost to machine the fixture is $42.41 and the cost of 3D printing the fixture was $22.83—or 46% savings! The machined fixture cost is only the purchase price of raw material from McMaster-Carr (Part #: 89785K251). This price neglects shipping and any tooling cost associated with milling process. The cost for 3D printing is simply the cost of the filament that was used to produce the part.
I chose to print the machine fixture out of Onyx, which is a micro-carbon reinforced nylon material from Markforged. Traditional 3D printing materials like ABS of PLA would not work for this application due to their lower strength and stiffness.
Performance
The 3D printed fixture worked as intended, but it was not perfect. I initially clamped the fixture in the vice with 150 in-lbs of torque on the vice handle, a typical torque for most setups with aluminum parts. Under this amount of clamping force the fixture did not crack and showed no signs of flexing in the vice, but during the facing operation on the second setup, I noticed the fixture lift out of the vice. I quickly stopped the machine and tapped the fixture back in place with a hammer, then increased the clamping force by applying 175 in-lbs of torque to the vice handle. The rest of the operation worked fine and no measurable inaccuracy resulted from this shift.
I believe that the nylon-based Onyx material, having a lower coefficient of friction than aluminum, required a higher clamping force to keep the fixture in place during the machining process. In the future I'll design a way to apply a downward force on my printed fixtures to avoid relying solely on friction to prevent lift.
Due to time and financial constraints, I was not able to machine and test a milled aluminum fixture for this part. Due to success of the 3D printed fixture I am confident that an aluminum fixture would work fine.
Conclusion
By 3D printing a fixture to machine this motor mount, I was able to save 46% on material cost, produce the part more quickly and efficiently, and get comparable performance to using a milled aluminum fixture. The key to my success with the 3D printed fixture was planning ahead and doing other work while the 3D printer was making the fixture as well as learning how to correctly clamp the material.
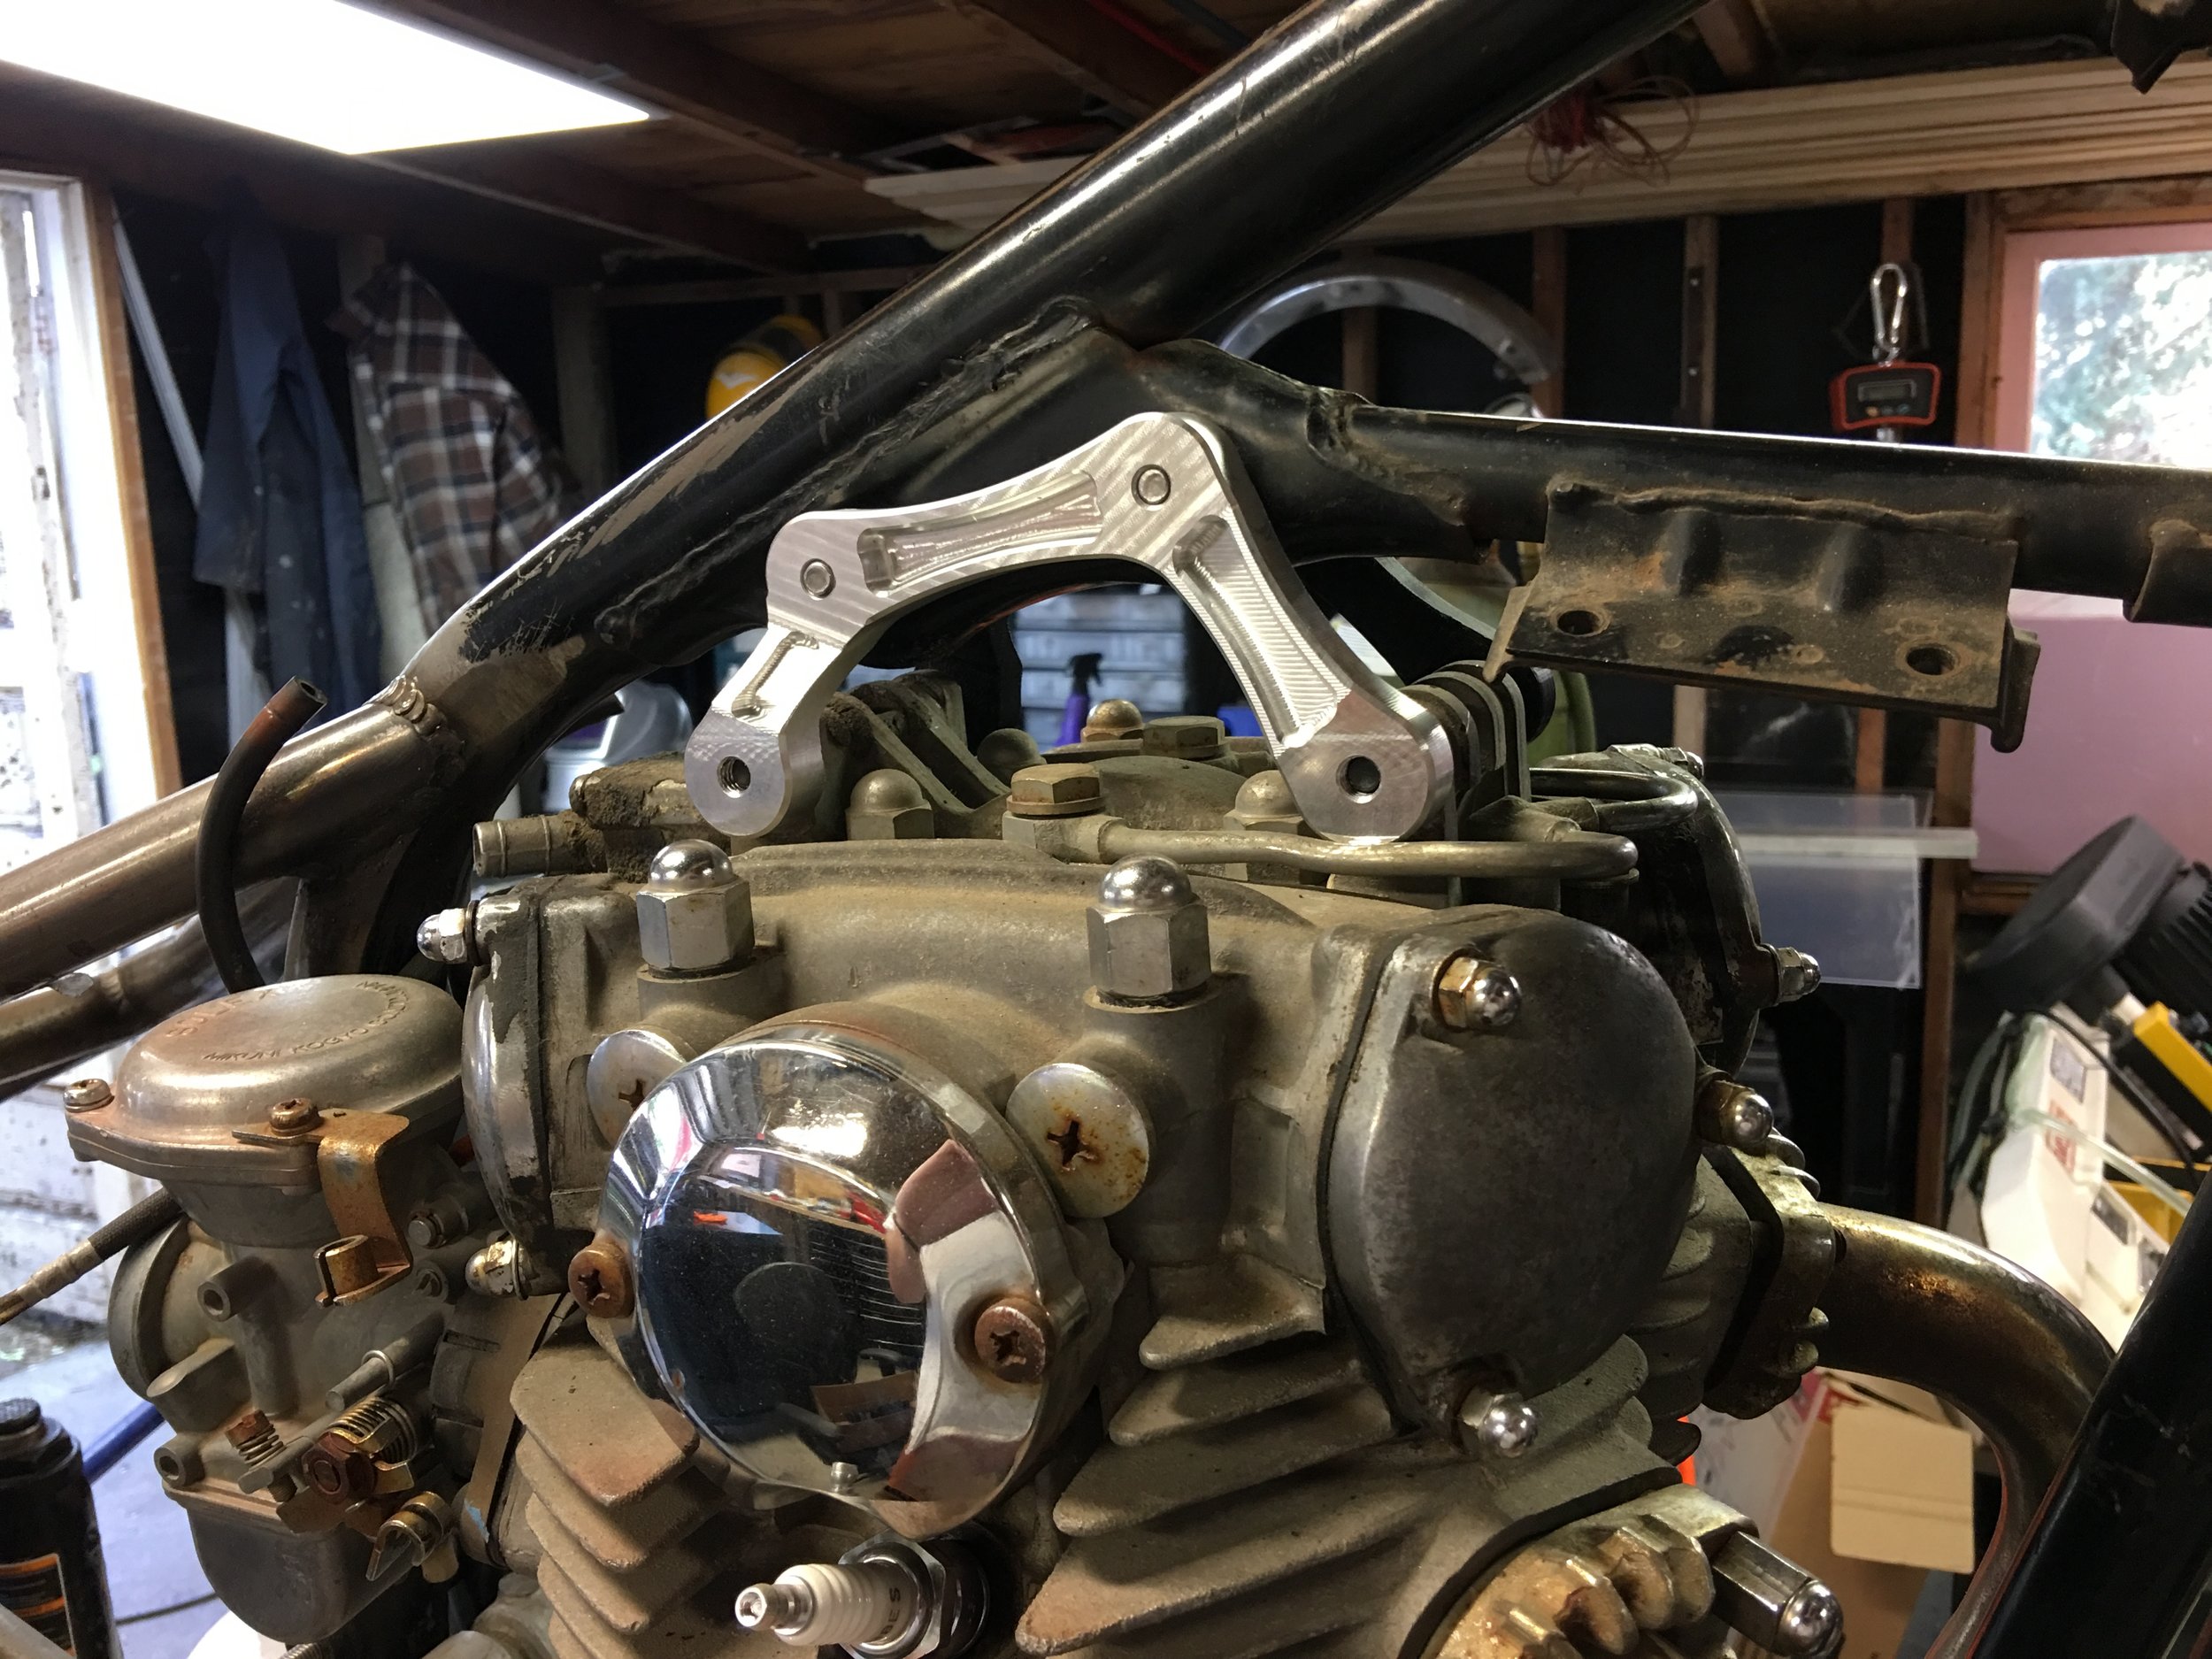
Finished Product